What Is A Roof De-Icing Cable?
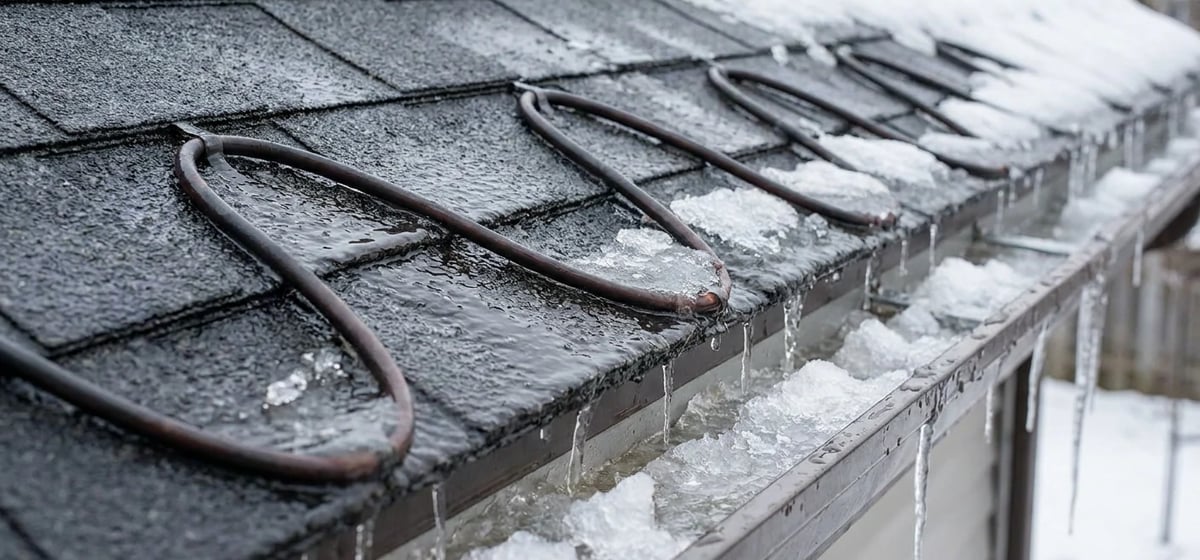
A roof de-icing cable is a thick, heated wire that you attach to the edge of your roof. You also run it inside your gutters and downspouts. When winter storms hit, you plug the cable in or turn it on at a switch. The wire gets warm and melts the snow and ice around it. Manufacturers adapted electrical resistance wires into outdoor heating cables for homes in the mid twentieth century. The word cable actually comes from the Latin word capulum, which means a halter or rope. Today, they're a common sight in snowy parts of the country. They usually sit in a zig-zag pattern along the lower edge of your shingles. You attach them using special metal clips that slide under your shingles. This holds the wire securely without putting holes in your roof.
Why It Matters For Your Home
These cables solve a major winter headache called an ice dam. When heat escapes from your attic, it melts the snow on the upper part of your roof. That water runs down to the colder roof edge and freezes solid. Over a few days, a thick ridge of ice builds up. This ridge blocks new water from draining into your gutters. The trapped water pools up and eventually pushes under your shingles. Once water gets under your roof, it leaks into your attic, ruins your insulation, and destroys your drywall. It can also peel the paint off your exterior walls and rot the wood framing. Fixing that kind of water damage is a huge mess. A de-icing cable prevents this by carving a clear path through the ice. The melted water can safely flow off the roof, into the gutter, and away from your house. To learn more about keeping your roof in good shape, check out our guide to Roofing.
What They Cost And How To Install Them
You can buy and install these cables yourself, or you can hire a professional. If you take the do it yourself route, a basic kit costs 50 to 100 dollars at a hardware store. These kits plug straight into a standard outdoor outlet. If you hire a pro, expect to pay 400 to 1000 dollars for the job. Prices vary based on your location and the size of your roof. A professional will usually install commercial grade cables. There are two main types of cables you'll find. Constant wattage cables are cheaper and put out the same amount of heat all the time. Self regulating cables are more expensive but adjust their heat output based on the outside temperature. This makes them much more energy efficient over a long winter. A pro might also wire the system directly to your breaker box so it turns on automatically when the temperature drops. If you need a new outlet installed near your roof line, you will need to hire an electrician. You can read more about hiring pros in our Hiring Contractors & What Things Cost guide.
What To Watch For
De-icing cables are helpful, but they come with a few rules. First, they use a lot of electricity. If you leave them on all winter, your power bill will skyrocket. You only need to turn them on when snow is actively melting and freezing on your roof. Turn them off once the roof is clear. Second, you need to keep your gutters clean. If your gutters are full of dry leaves, a hot cable can be a fire hazard.
Here are a few quick tips to keep your system running well:
- Test your cables in the fall before the first snow arrives.
- Clean all pine needles and leaves out of your gutters so the cables don't overheat them.
- Make sure the cables don't cross over or touch each other, which can cause a short circuit.
- Check the clips every spring to ensure winter winds didn't pull them loose.
Finally, remember that cables treat the symptom, not the root cause. If you get terrible ice dams every year, you probably lack attic insulation. Heat is escaping from your living space into the attic. Adding more insulation stops the melting cycle completely. Until you fix the insulation, cables are a great backup plan to keep your home dry. For more details on your home power limits, see our Electrical guide.