Paint Peeling Above the Shower? How to Fix It for Good

Tired of finding paint flakes in your tub? Learn how to properly scrape, patch, prime, and repaint the drywall above your shower for a permanent, moisture-proof fix.
It starts as a small, barely noticeable bubble near the corner of the tub. A few weeks later, that bubble turns into a crack. Before long, you are picking dry, curly flakes of paint off your shampoo bottles and out of the drain. Dealing with paint peeling above shower surrounds is a classic homeowner headache, and **in my experience, it happens** in houses of all ages.
The transition zone where your fiberglass tub enclosure or tile meets the painted drywall takes a daily beating. It is subjected to rising steam, direct water splashes, and heavy condensation. If the original builder or previous owner just slapped up standard flat wall paint, failure isn't a possibility, it is a guarantee. Flat paint is highly porous, absorbing moisture like a sponge until the bond between the paint and the drywall paper completely gives way.
Fixing this specific problem requires more than just brushing on a fresh coat of color. If you don't address the underlying surface and use the right materials, you will be back to scraping flakes again in six months. Here is exactly how to repair that damaged wall so it stays smooth, clean, and intact for years.
Why is Paint Peeling Above Your Shower Surround?
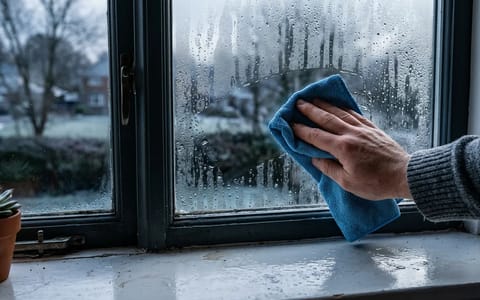
To fix the issue permanently, it helps to understand the mechanics of why the paint is failing. When you take a hot shower, steam naturally rises. A typical 10-minute hot shower can release over a pint of water vapor into the air. As that hot, moisture-laden air hits the cooler surface of your upper walls and ceiling, it condenses back into liquid water. This condensation sits directly on the paint film.
If the wall is coated in a standard builder-grade flat or eggshell paint, that water slowly seeps through the microscopic pores of the finish. Once the moisture reaches the paper facing of the drywall beneath, it breaks down the adhesive bond of the paint. The paint swells, bubbles, and eventually cracks open. Once a crack forms, steam gets directly behind the paint film, accelerating the peeling process rapidly.
Why is My Bathroom Paint Peeling Everywhere Else?
If you find yourself asking why your bathroom paint is peeling on walls far away from the tub, the answer usually comes down to poor ventilation combined with the wrong paint finish. When a bathroom lacks a strong exhaust fan, steam fills the entire room. If the walls are coated in flat or matte paint, the moisture penetrates the surface everywhere, causing widespread flaking and bubbling well beyond the shower zone.
What Causes Sagging Paint on the Wall?
Sometimes, before it flakes, you will notice sagging paint on the wall. This happens because modern latex paint is highly elastic. When steam penetrates the surface, water pools behind the paint film, causing it to stretch and sag like a heavy water balloon. If you see sagging paint, do not just paint over it. You must pop the blister, scrape away the stretched acrylic, and let the underlying surface dry out completely before patching.
Ceiling Paint Peeling Above the Shower
Because heat and steam naturally rise, ceiling paint peeling above the shower is often the first symptom of a moisture problem. The ceiling takes the most direct hit from your daily hot water routine. Gravity works against you here, as condensation collects into heavy droplets that pull the failing paint downward.
Fixing the ceiling requires the exact same scraping and priming process as the walls, but you need to rethink your topcoat. You should strongly consider painting the entire bathroom ceiling with a satin or semi-gloss bathroom-grade paint, rather than traditional flat ceiling paint, to create a continuous moisture barrier directly above the tub.
Assessing the Damage: Is It Just Paint, or Is the Drywall Ruined?
Before you buy any supplies, you need to determine the extent of the water damage. Sometimes, the problem is strictly cosmetic. Other times, the drywall itself has been compromised.
Last year, I helped a neighbor fix a guest bathroom where the paint had been flaking for months. When we pressed firmly on the exposed wall just above the tile line, the drywall crumbled inward like wet cardboard. The moisture had fully saturated the gypsum core. We had to cut out a two-foot section and patch in new moisture-resistant greenboard before we could even think about painting.
To test your walls, press your thumb firmly against the exposed drywall where the paint has peeled away. If the wall feels rock-solid and sounds sharp when you tap it, you are in luck: it is just a surface failure. If the wall feels spongy, squishy, or your thumb leaves an indentation, the drywall is structurally compromised.
Dealing with White Plaster Walls
If your home was built before the 1960s, you might uncover hard white plaster behind that peeling paint instead of drywall. White plaster handles moisture better than paper-faced drywall, but it presents its own challenges. When water penetrates white plaster, it can cause efflorescence, which is a chalky mineral buildup that pushes paint right off the wall. To fix peeling paint on white plaster, you must scrape away the loose flakes, wash away any chalky residue with a vinegar-and-water solution, and use a specialized masonry or oil-based primer before applying your topcoat.
Tools and Materials for a Permanent Fix
If your wall surface is solid, you can easily tackle this repair yourself in a single weekend. The secret to success lies entirely in the products you choose. Do not try to save money by using leftover living room paint. You will need:
- A stiff metal putty knife or a 5-in-1 painter's tool
- 120-grit sanding sponges
- Moisture-resistant spackle (like Zinsser or DAP brand)
- A high-adhesion, moisture-blocking primer (such as Zinsser Bulls Eye 1-2-3 or KILZ 2)
- Bathroom-specific interior paint in a satin or semi-gloss finish
- A small foam roller and a high-quality angled brush
- Microfiber cloths for dusting
How to Fix Paint Peeling Above the Shower
With your materials gathered, it is time to prep the wall. The preparation phase is tedious, but it dictates how well your final coat will perform. Rushing this process is the number one reason bathroom paint jobs fail.
- Scrape away the loose edges. Use your putty knife to gently push under the flaking paint. Keep the blade at a shallow angle to avoid gouging the brown paper facing of the drywall or scratching your white plaster. Continue scraping until you reach paint that is firmly bonded to the wall and will not easily lift.
- Sand the transition lines. Once all the loose flakes are gone, you will be left with a harsh, stepped edge between the bare wall and the remaining old paint. Use a 120-grit sanding sponge to feather this edge down so the transition feels relatively smooth to the touch.
- Clean the surface thoroughly. Wipe the entire area down with a damp microfiber cloth to remove all dust. If you see small spots of surface mildew on the bare drywall, clean them following the EPA guidelines for mold cleanup using water and a mild detergent. Let the wall dry completely.
- Patch the uneven areas. Apply a thin layer of moisture-resistant spackle over the stepped edges using your putty knife. Your goal is to fill the shallow depression where the old paint used to be, bringing it flush with the surrounding wall.
- Sand the patch smooth. Once the spackle is 100% dry (usually 2 to 4 hours depending on humidity), lightly sand it with your 120-grit sponge until it blends perfectly with the wall. Wipe away the dust again.
- Apply a moisture-blocking primer. This is the most critical step. Using a foam roller, apply a solid coat of your high-adhesion primer over the patched areas and the surrounding old paint. The primer seals the porous spackle and drywall paper, creating a waterproof barrier. Let it dry according to the can's instructions.
- Paint with a bathroom-grade finish. Apply two coats of your satin or semi-gloss bathroom paint. These finishes have a higher sheen than flat paint, which naturally repels water droplets and makes the wall much easier to wipe down.
How Long Should You Wait Before Showering?
One of the biggest mistakes homeowners make is finishing their beautiful new paint job on a Sunday afternoon and taking a steaming hot shower on Monday morning. Modern latex paints dry very quickly, but drying is not the same thing as curing.
Paint feels dry to the touch when the water solvents evaporate. However, the chemical cross-linking process that gives the paint its durability and moisture resistance takes much longer. In a humid bathroom environment, latex paint can take anywhere from 14 to 30 days to fully cure.
Dry to the touch does not mean ready for a steam bath. Give your new paint at least 48 hours before turning on the hot water.
Try to wait at least 48 hours before using that specific tub or shower. When you do resume using it, keep your showers relatively short and slightly cooler than normal for the first week to give the new paint a fighting chance to harden completely.
The Secret to Keeping Your Paint Intact
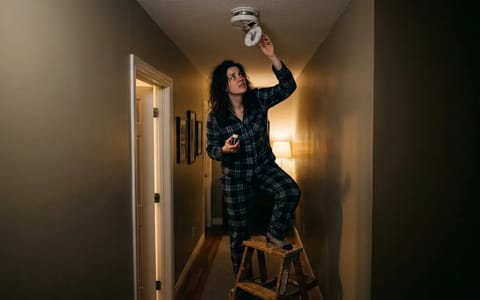
You can use the most expensive primer and the highest-quality paint on the market, but if your bathroom lacks proper ventilation, the moisture will eventually win. The absolute best way to protect the ceiling and drywall above your shower is to aggressively manage the humidity in the room.
Your bathroom exhaust fan is your first line of defense. It should be turned on before you even step into the shower, and crucially, it needs to remain running for at least 30 minutes after you turn the water off. Most people flip the fan off the second they leave the room, trapping a massive cloud of residual steam inside to settle on the walls.
Taking the time to scrape, patch, and properly prime the wall is hard work, but it is incredibly satisfying. By using the right moisture-blocking materials and improving your daily ventilation habits, you can stop looking at those ugly peeling edges and finally enjoy a clean, flake-free shower.
- Standard flat builder-grade paint will almost always fail in the high-humidity zone above a shower.
- Never paint directly over peeling edges; the new paint will simply pull the old paint off the wall as it dries.
- Proper ventilation is the only way to prevent the issue from returning—run your exhaust fan for 30 minutes after every shower.