Crawl Space Doors: How to Seal and Secure Your Access Panel
A poorly sealed crawl space door is a major source of drafts, pests, and moisture. Learn how to replace, insulate, and weatherstrip your access panel for better energy efficiency.
Full guide Foundation & Structure Learn how to spot dangerous foundation cracks and protect your home from costly structural damage.Most homeowners don't think about their crawl space doors until a mouse scampers across the kitchen floor or the winter utility bill spikes. Whether your access panel is hidden in a bedroom closet or exposed to the elements outside, a poorly sealed entry is a massive energy drain. Upgrading this simple barrier stops drafts, blocks pests, and keeps damp air out of your living space. This overlooked entry point is critical for maintaining your home's energy efficiency, indoor air quality, and protection against unwanted guests.
Signs You Need to Seal or Replace Your Crawl Space Door
Before diving into materials, it helps to know if your current panel is failing. If you are experiencing any of the following symptoms, it is time to evaluate your crawl space access:
- Drafts and cold floors: If the floors directly above your crawl space feel freezing in the winter, unconditioned air is likely bypassing your thermal envelope.
- Visible daylight: Go into your crawl space during the day and look at the door. If you see light creeping in around the edges, you do not have a proper crawlspace door seal.
- High indoor humidity: A warped or rotting exterior door allows humid air to constantly flow under your house, making your AC work harder.
- Pest activity: Rodent droppings, chewed wood, or nesting materials near the entrance are clear signs your barrier is compromised.
Why Do Crawl Space Doors Fail?
Crawl space doors take a beating. Exterior panels sit just inches above the soil, absorbing ground moisture, rain splashback, and direct sunlight. This constant exposure leads to material degradation: wood rots, metal rusts, and even plastics can become brittle over time due to UV radiation. For instance, untreated wood exposed to constant moisture can begin to rot in as little as 3 to 5 years. The capillary action of soil can wick moisture directly into untreated wood, accelerating decay.
Interior hatches, often cut straight out of the subfloor, usually lack any insulation or weatherstripping. These gaps allow unconditioned air to bypass your home's thermal envelope, creating drafts and making your HVAC system work harder. Additionally, the constant expansion and contraction of materials due to temperature and humidity fluctuations can cause seals to break down, hinges to loosen, and doors to warp, creating new pathways for air and moisture.
According to Energy Star, sealing leaks around doors, windows, and foundation access points is one of the most cost-effective ways to improve your home's efficiency. As of 2026, a standard 3/4-inch plywood panel offers an insulation value of roughly R-1. If your crawl space is unconditioned, that thin piece of wood is the only thing standing between your cozy living room and freezing winter air or humid summer heat. This lack of a thermal barrier is a primary reason for significant energy loss.
How to Measure for Crawl Space Doors
Getting the dimensions right is the most critical step before you buy or build a replacement. Measuring incorrectly will leave you with gaps that defeat the purpose of the upgrade.
- Measure the rough opening: Do not measure your old door. Instead, measure the actual opening in the foundation block or floor joists.
- Check width and height in three places: Measure the top, middle, and bottom for width. Measure the left, center, and right for height. Foundation openings are rarely perfectly square.
- Use the smallest measurement: Always use the narrowest width and shortest height to ensure the new frame will fit inside the rough opening.
- Account for the mounting flange: If you are buying a surface-mount exterior cover, ensure you have at least 2 to 3 inches of flat, clear foundation wall around the entire perimeter to attach the masonry anchors.
Exterior vs. Interior: What Are Your Options?
The location of your crawl space access determines how you should upgrade it. You have two main categories of access points, and each requires a specific approach.
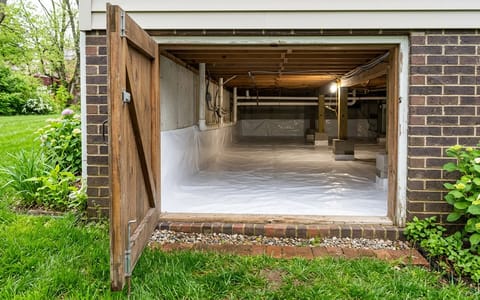
Exterior Access Doors: These are cut into the foundation wall itself. Traditional exterior doors were built from scrap lumber or plywood, which inevitably rots. When I replaced the exterior wood hatch on my own 1960s ranch, I found the bottom edge had completely rotted out from years of rain. Poking it with a screwdriver felt like pushing through wet cardboard. Switching to a pre-hung PVC door solved the moisture problem permanently. Today, you can buy heavy-duty ABS plastic crawl space door covers that mount directly to the brick or block foundation. Based on typical 2026 prices, these range from $60 to $180. These modern solutions offer superior moisture resistance, pest deterrence, and often come with built-in insulation features, making them a durable, low-maintenance choice.
Interior Access Hatches: These are usually located in the floor of a closet, pantry, or utility room. Because they sit flush with the floor, replacing the door itself isn't always practical. Instead, the focus must be on air-sealing the perimeter and insulating the underside of the existing panel so it matches the thermal resistance of the surrounding floor. For interior hatches, ensuring a tight seal is paramount, especially if your crawl space is vented and exchanging air with the outside. An insulated cover can also be added over the existing hatch for an extra layer of protection.
Pre-Fab Crawl Space Door Buying Guide: PVC vs. Metal
When shopping for a replacement, you will likely choose between a prefabricated unit and building one from scratch. A pre fab crawl space door buying guide comes down to two main material debates: PVC versus metal, and standard versus custom.
PVC vs. Metal Crawl Space Door: PVC and ABS plastic doors have become the 2026 industry standard for residential homes. They will never rust, they do not rot, and they require zero painting. Metal doors, typically made from steel or aluminum, offer unmatched security against large animals and intruders. However, steel is highly prone to rust in damp environments unless it is heavily galvanized and regularly repainted. If you live in a highly humid environment, learning how to choose a crawl space door in SC, Florida, or similar coastal regions means prioritizing rot-proof, rust-proof materials like PVC.
Standard vs. Custom Pre-Fab Crawl Space Door: Most prefabricated exterior doors are sized to fit standard cinder block openings (like 32x24 or 24x16 inches). If your home has an older stone foundation or an irregularly sized opening, you will likely need to order a custom pre-fab crawl space door. Many manufacturers now allow you to submit your exact rough opening measurements online to receive a custom-cut PVC frame and door that drops perfectly into place.
Choosing the Right Materials for Your Upgrade
Selecting the correct materials is crucial for a long-lasting and effective crawl space door upgrade. Consider both the environment and the desired performance when making your choices.
Door Materials: As mentioned, PVC or ABS plastic is highly recommended due to its inherent resistance to rot, rust, and insect damage. These materials are also UV-stable, meaning they won't degrade quickly in sunlight. If you must use wood, opt for pressure-treated lumber for the frame and door panel, and ensure it is properly sealed and painted to resist moisture. Metal doors, typically galvanized steel, offer excellent security but must be well-coated to prevent rust in damp crawl space environments.
Insulation Materials: Extruded polystyrene (XPS) rigid foam board is an excellent choice for insulating the back of your crawl space door. It has a high R-value per inch, is closed-cell (meaning it resists moisture absorption), and is easy to cut and adhere. Expanded polystyrene (EPS) is a more budget-friendly option, but it has a slightly lower R-value and can absorb some moisture over time. For a superior air seal and insulation, some homeowners opt for DIY spray foam kits, though these can be messier to apply.
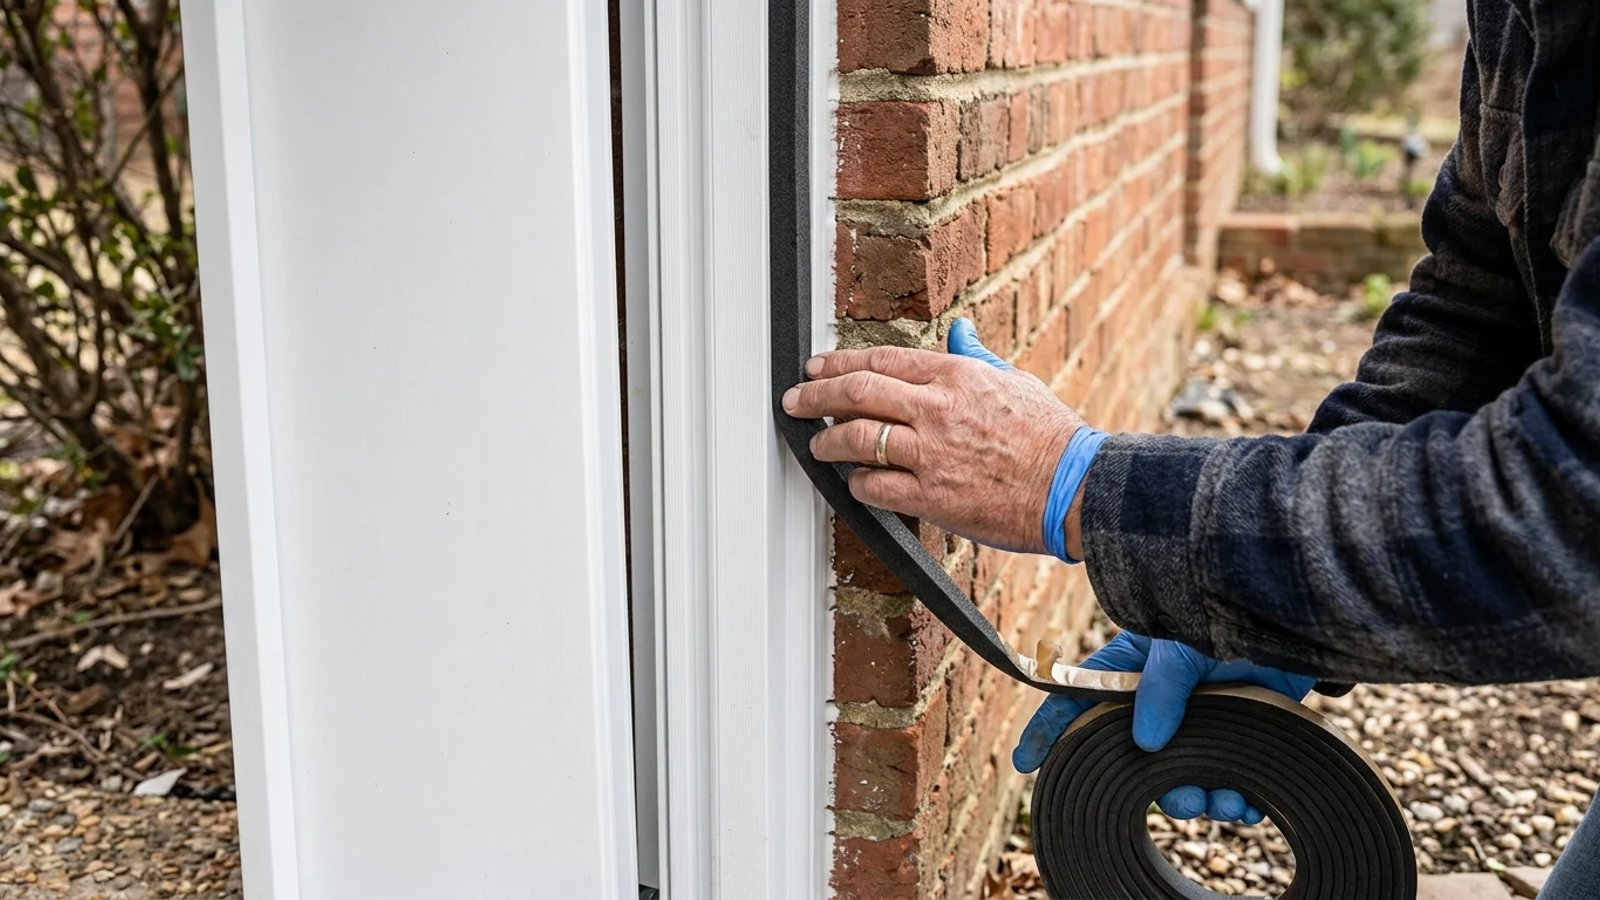
Weatherstripping: The type of weather stripping for a crawl space door you choose will significantly impact the airtightness. Closed-cell foam tape is ideal because it compresses well to create a tight seal and, unlike open-cell foam, will not absorb moisture. EPDM (ethylene propylene diene monomer) rubber weatherstripping is another durable, long-lasting option that stands up well to temperature fluctuations and provides an excellent seal against drafts and pests.
How to Insulate and Weatherstrip Your Access Panel
Creating a tight seal on crawlspace doors is a straightforward weekend project. You will need a tape measure, a utility knife, 2-inch XPS (extruded polystyrene) rigid foam board, foam-safe construction adhesive, and a roll of 3/8-inch closed-cell weatherstripping tape.
- Remove and clean the door. Take the access panel off its hinges or lift it out of the floor. Scrape away any old, brittle caulk or flattened foam tape from the frame using a putty knife.
- Measure and cut the insulation. Measure the back of the door, leaving a 1-inch border around the edges where the door rests against the frame. Score the 2-inch XPS rigid foam board with a utility knife and snap it to size.
- Glue the foam to the door. Apply a generous zigzag bead of foam-safe construction adhesive to the back of the door. Press the rigid foam firmly into place and let it cure for 30 to 60 minutes.
- Apply the weatherstripping. Stick the 3/8-inch closed-cell foam tape along the lip of the door frame (the stop) where the door makes contact. Closed-cell foam is crucial here, as open-cell foam will absorb moisture.
- Reinstall the panel. Place the door back into the frame and press down. You should feel slight resistance from the new weatherstripping compressing, which confirms you have an airtight seal.
Crawl Space Access Door Installation
If you are replacing the entire unit rather than just weatherstripping the old one, proper crawl space access door installation ensures a permanent fix. For a surface-mount pre-fab exterior door:
- Prep the surface: Clean the exterior foundation wall around the opening with a wire brush so the sealant will adhere properly.
- Apply sealant: Run a thick, continuous bead of exterior-grade polyurethane masonry sealant around the back flange of the new door frame.
- Position and drill: Press the frame against the foundation. Using a hammer drill and a masonry bit, drill through the pre-marked holes on the flange directly into the concrete block.
- Secure the frame: Tap masonry anchors (Tapcons) into the drilled holes and tighten them until the sealant squeezes out slightly around the edges, confirming a watertight seal.
Securing the Hatch Against Intruders
A perfectly insulated door won't do much good if a raccoon can pry it open. Exterior crawl space doors are notorious entry points for rodents, feral cats, and larger pests seeking shelter. A flimsy wooden turn-button is not enough to keep them out. These pests, like mice, rats, snakes, and raccoons, can cause significant damage, chew through wiring, contaminate insulation, and introduce diseases into your home.
Upgrade your hardware to heavy-duty galvanized steel or brass. Install two barrel bolts: one on the left and one on the right, to keep the panel tightly compressed against the weatherstripping. For added security, especially if you store tools or emergency supplies under the house, install a heavy-duty hasp and a rust-resistant padlock. Consider adding tamper-proof screws to the door hinges as well, especially on exterior access points, to prevent easy removal.
For persistent pest problems, sometimes simple physical barriers aren't enough. Motion-activated lighting near exterior crawl space doors can deter nocturnal animals, and regularly clearing vegetation around the foundation reduces hiding spots for pests. Remember, a secure door is your first line of defense against unwanted wildlife becoming unwanted houseguests.
Routine Maintenance for Long-Term Protection
Once you've upgraded your crawl space door, a little routine maintenance will ensure it continues to perform optimally for years to come. Think of it as an annual health check for your home's foundation entry point.
Annual Inspection: Once a year, typically in the fall before colder weather sets in, inspect your crawl space door. Check the weatherstripping for any signs of cracking, tearing, or permanent compression that might compromise its seal. Ensure hinges are secure and free of rust, and that any locks or bolts are functioning smoothly. For exterior doors, check for any new gaps around the frame or signs of pest activity.
Cleaning and Sealing: Keep the area around your crawl space door clear of debris, leaves, and spiderwebs. This not only helps with pest control but also ensures that the door can close properly. If you have a wooden door, periodically inspect the paint or sealant for chips or cracks and reapply as needed to protect against moisture. For plastic doors, a simple wipe-down is usually sufficient.
Should You Call a Foundation Professional?
While sealing and swapping a door panel is a highly accessible DIY task, the area surrounding the door can sometimes reveal deeper issues. If you pull off the old door and notice the wood framing around it crumbles in your hand, you have a larger moisture problem. This could indicate long-term water intrusion, fungal growth, or even termite damage that extends beyond the door itself.
Ignoring these deeper structural problems can lead to more costly repairs down the line. A professional can assess the extent of the damage, identify the root cause of moisture issues, and recommend appropriate solutions, ensuring your home's foundation remains sound. Taking an afternoon to properly seal and secure your crawl space doors pays off immediately in fewer drafts and lower utility bills. By choosing moisture-resistant materials and heavy-duty hardware, you can fix this vulnerable spot on your foundation once and for all, contributing significantly to your home's overall health and longevity.
Crawl Space Doors FAQ
How do I create a tight seal on a crawlspace door?
The most effective method is combining rigid foam insulation on the back of the door panel with high-quality closed-cell foam weatherstripping around the door stop. Heavy-duty barrel bolts should be used to pull the door tightly against the weatherstripping, compressing it slightly.
What is the best material for crawl space doors?
For exterior doors, PVC or ABS plastic is the top choice as of 2026. It will not rot, rust, or warp like wood or metal. For interior floor hatches, standard 3/4-inch plywood backed with 2-inch XPS foam board is typically sufficient.
How do you seal a crawl space entrance from water?
If water is pooling around your exterior access, you need to address drainage first. Grade the soil away from the door, install a small foundation well if the door is below grade, and use a generous bead of polyurethane masonry sealant behind the door's mounting flange during installation.
- Swap rotting exterior wood panels for durable PVC or heavy-duty plastic covers.
- Glue 2-inch XPS rigid foam board to the back of your access door to block thermal transfer.
- Use 3/8-inch closed-cell foam tape around the door perimeter to stop air leaks.
- Secure exterior doors with rust-resistant barrel bolts or a padlock hasp to deter pests.