How Deep Should Mulch Be? A Simple Bed and Garden Guide
Mulch suppresses weeds and retains moisture, but getting the depth wrong can suffocate your plants. Learn the exact measurements and materials for flower beds and raised gardens.
Full guide Landscaping, Drainage & Outdoor Master your yard with simple tips for proper drainage, healthy lawns, and safe trees.A fresh layer of mulch instantly makes a yard look finished and well-cared for, but understanding how deep should mulch be is crucial for it to act as a protective blanket for your soil. It also suppresses aggressive weeds, locks in vital moisture during dry spells, and regulates soil temperature to keep roots cool in the summer and insulated in the winter.
However, applying mulch is not a case of "if some is good, more is better." A common mistake homeowners make is dumping bags of wood chips into massive mounds around trees and shrubs. Piling it too high suffocates plant roots, while spreading it too thin lets weeds easily poke through. If you want to protect your plants and your landscaping budget, you need to hit the exact right depth.
How Deep Should Mulch Be? The Goldilocks Zone
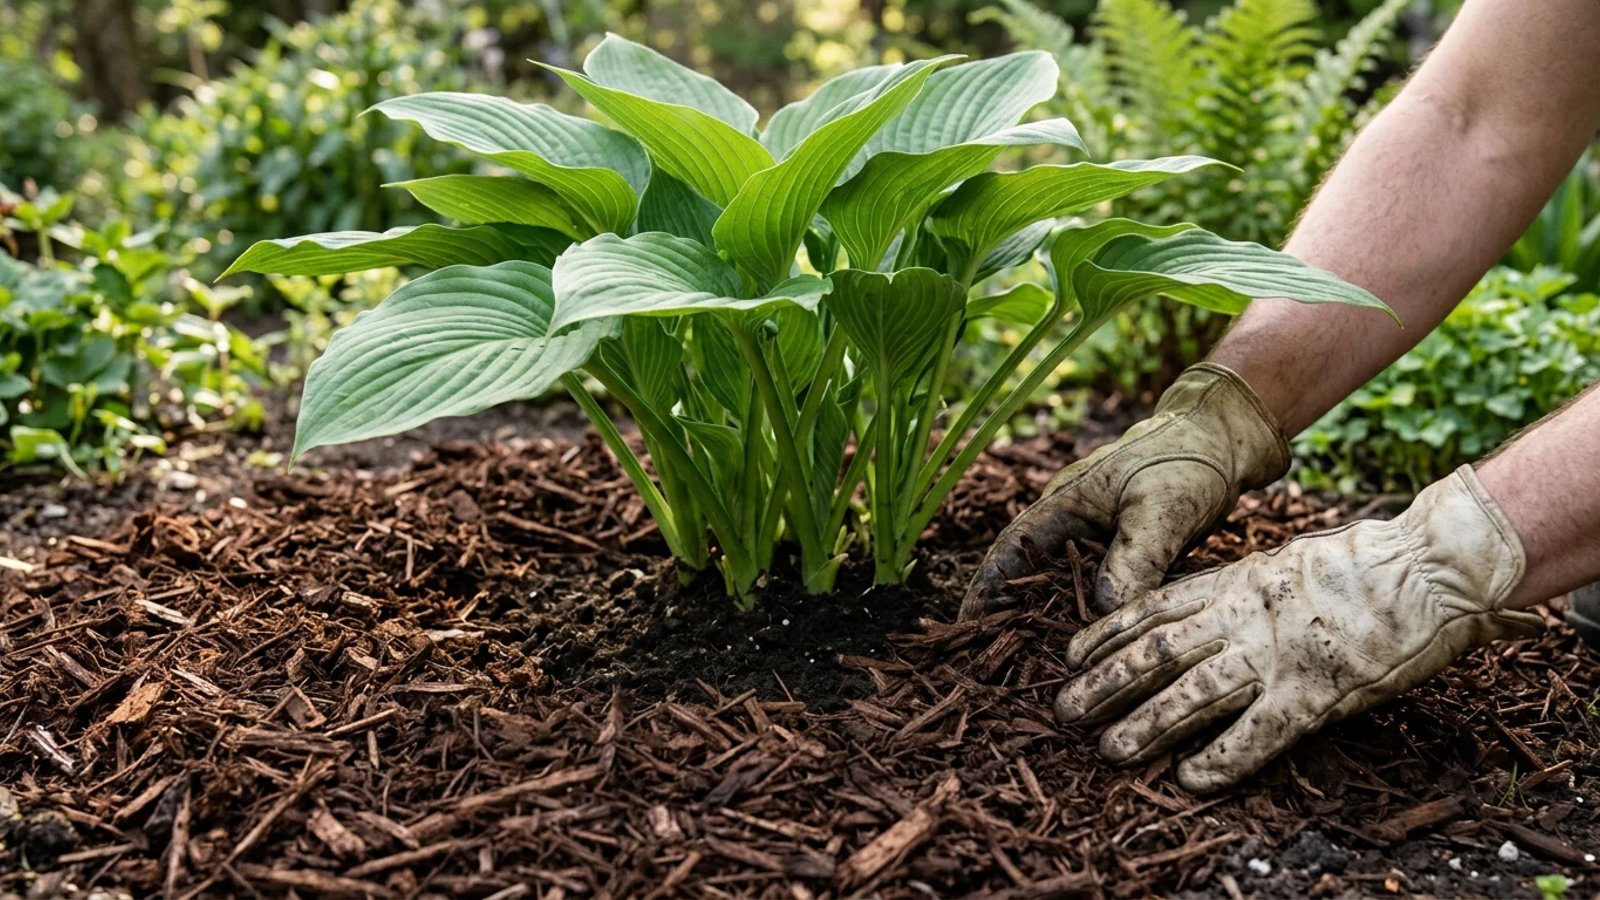
When determining how deep should mulch be, the sweet spot for nearly all garden applications is 2 to 3 inches. This depth is thick enough to block the sunlight that weed seeds need to germinate, but thin enough to allow rainwater and oxygen to penetrate the soil.
If you spread mulch only 1 inch thick, aggressive weeds like dandelions and crabgrass will push right through it. Also, a thin layer breaks down rapidly and fails to insulate the soil against moisture loss. On a hot afternoon, the sun will bake the soil right through a 1-inch layer.
Conversely, if you pile mulch 4 to 6 inches deep, you create a barrier that light rain cannot penetrate. The water simply absorbs into the top layer of the mulch and evaporates before it ever reaches the soil. Deep mulch also encourages plants to grow their roots upward into the mulch layer rather than down into the soil, leaving them incredibly vulnerable to drought.
The Danger of "Volcano Mulching"
Drive through almost any neighborhood, and you will see trees surrounded by massive, cone-shaped mounds of mulch piled high against the trunk. Landscapers call this "volcano mulching," and it is one of the fastest ways to slowly kill a tree.
Tree bark is meant to be exposed to the air. When moist mulch is piled against the trunk, it causes the bark to rot. This decay opens the door for boring insects and fungal diseases. According to the Penn State Extension guidelines on landscape mulching, mulch should never touch the trunk of a tree. Always leave a 2- to 3-inch gap of bare soil between the mulch and the base of any tree or plant stem.
Should I Mulch Before or After Planting?
A frequent question when setting up new flower beds is whether to lay the mulch down first and plant through it, or plant first and mulch around the new additions.
Always mulch after planting.
If you lay mulch first, digging holes for your plants will mix the mulch deep into the soil. As wood mulch breaks down underground, it temporarily robs the surrounding soil of nitrogen—a nutrient your new plants desperately need to establish their roots. Planting first also ensures you don't accidentally bury small seeds or smother the delicate crowns of new transplants.
Get your plants in the ground, water them thoroughly to settle the soil, and then carefully spread your 2 to 3 inches of mulch around them, keeping that crucial gap around the stems.
Vegetable Gardens: Should I Mulch My Edibles?
Many homeowners meticulously mulch their front foundation beds but leave their backyard vegetable gardens completely bare. You absolutely should mulch your vegetable garden. Vegetables are heavy drinkers, and a proper layer of mulch—around 2 to 3 inches deep—can cut your watering needs by up to 50 percent.
Mulch prevents soil from splashing up onto the lower leaves of your plants during heavy rain. This soil splash is the primary way soil-borne diseases, like early blight on tomatoes, infect your plants. A good layer of mulch acts as a clean barrier between the dirt and your food.
However, the type of mulch you use in an edible garden is completely different from what you use in a front yard landscape bed.
The Best Mulch for Raised Beds vs. Traditional Flower Beds
Not all mulches are created equal. Matching the material to the location is just as important as getting the depth right.
Traditional Flower and Shrub Beds
For permanent landscape beds filled with shrubs, perennials, and trees, you want a dense, slow-to-decompose material. Hardwood bark, cedar chips, and pine bark nuggets are excellent choices. They look tidy, hold their color for months, and only need to be topped off once a year.
Cedar is particularly popular because its natural oils help repel certain insects, and it lasts longer than standard dyed hardwood. Expect to pay between $3 and $5 per two-cubic-foot bag at a local home center for quality wood mulch.
Raised Vegetable Garden Beds
Never use hardwood or dyed wood chips in a raised vegetable bed. As wood chips decompose, the bacteria doing the breaking down consume heavy amounts of nitrogen from the soil. While a mature shrub won't mind this temporary nutrient drop, fast-growing vegetables like peppers and lettuce will quickly turn yellow and stunt.
Last fall, I tested a thick layer of shredded leaves in my own raised tomato beds instead of the usual wood chips. Not only did the soil retain moisture brilliantly through a dry September, but the leaves broke down rapidly over the winter, feeding the soil with rich organic matter without tying up a single ounce of nitrogen.
For raised vegetable beds, stick to these fast-breaking, nitrogen-friendly materials:
- Straw: Golden, clean, and excellent at reflecting heat to keep roots cool. Ensure you buy weed-free straw, not hay (which is full of seeds).
- Shredded Leaves: Often free, leaves make a perfect garden mulch. Run over them with a lawnmower first; whole leaves can mat together and block water.
- Grass Clippings: A great free resource, provided you do not treat your lawn with chemical herbicides. Apply in thin layers so they don't turn into a slimy, smelly mat.
How to Calculate Your Mulch Needs
Before you drive to the garden center, you need to know how much to buy. If you are mulching a small area, bagged mulch is convenient. For larger projects, ordering bulk mulch delivered by the cubic yard is far more cost-effective.
A standard rule of thumb: One cubic yard of mulch covers 100 square feet at a depth of 3 inches.
To calculate your needs, measure the length and width of your garden bed in feet and multiply them to get the square footage. Divide that number by 100 to determine how many cubic yards you need. If you prefer bags, keep in mind that it takes exactly 13.5 bags (at 2 cubic feet each) to equal one cubic yard.
Step-by-Step: How to Properly Mulch a Garden Bed
Putting down mulch is hard work, but doing the prep work properly ensures you won't be out there pulling weeds a month later. Here is how to lay mulch the right way:
- Pull existing weeds. Remove all visible weeds by the roots, as mulch will not kill established weeds that have already broken the soil surface.
- Edge the bed. Use a half-moon edger or a sharp spade to cut a clean, 2-to-3-inch deep trench along the border of the bed to hold the mulch in place and stop grass from creeping in.
- Water the soil. Soak the bare soil thoroughly before mulching; if you put mulch over dry dirt, it will act as an umbrella and keep the soil dry.
- Dump and spread. Pour the mulch in small piles throughout the bed and use a hard steel rake or your gloved hands to spread it evenly.
- Measure the depth. Check your work to ensure the mulch is sitting in the 2- to 3-inch Goldilocks zone.
- Clear the stems. Pull the mulch back 1 to 2 inches away from the base of all plants, shrubs, and tree trunks to prevent moisture-induced rot.
The 2- to 3-inch depth is the Goldilocks zone: thick enough to stop weeds, but thin enough to let the soil breathe.
Maintaining the right mulch depth is one of the easiest ways to keep your yard healthy and low-maintenance. By sticking to the 2- to 3-inch rule, keeping the material away from plant stems, and choosing the right material for your edibles versus your ornamentals, you'll spend less time watering and weeding, and more time actually enjoying your outdoor space.
- Aim for a 2- to 3-inch layer of mulch to block weeds without suffocating plant roots.
- Never pile mulch against tree trunks (known as volcano mulching)—it causes bark rot and invites boring insects.
- Wood chips are excellent for ornamental beds, but they tie up soil nitrogen, making them a poor choice for vegetable gardens.
- One cubic yard of mulch will cover roughly 100 square feet at a depth of 3 inches.