How to Caulk Baseboards for a Flawless, Gap-Free Finish
Learn how to caulk baseboards like a pro. This beginner-friendly guide covers the best paintable caulk, essential tools, and the secret to flawless, gap-free trim.
Full guide Interior: Paint, Drywall & Trim Learn how to patch drywall, choose the right paint, and update your interior trim.Nothing ruins the look of a freshly painted room quite like a dark, jagged shadow line running between the top of the baseboard and the wall. Even if the drywall is perfectly flat and the carpenter did an excellent job coping the joints, tiny gaps are inevitable. Wood naturally shrinks and expands with seasonal humidity, and walls are rarely perfectly plumb. Learning how to caulk baseboards is the single most effective way to elevate a DIY paint job from amateur to professional.
Many homeowners skip this step because they fear making a smeared, sticky mess that looks worse than the original gap. It is a valid concern. Pushing a thick bead of sticky paste along a wall can quickly get out of hand if you lack the right technique. But with the correct materials, a few inexpensive tools, and a simple smoothing method, anyone can achieve crisp, clean lines.
Why Do You Need to Caulk Baseboards?
The primary reason most people pick up a caulk gun is aesthetics. A continuous bead of white caulk visually fuses the wooden trim to the drywall, creating a seamless transition that makes the trim look like a natural extension of the room, effectively sealing gaps often up to 1/8 inch wide. When you paint over that smooth transition, the baseboards look solid, expensive, and custom-built.
But the benefits go far beyond looks. Baseboards cover the expansion gap between your flooring and the bottom plate of your wall framing. In many homes, especially older ones, this gap is a superhighway for drafts and pests. Ants, spiders, and silverfish frequently use these unsealed gaps to travel from the crawlspace or wall cavities straight into your living room.
From an energy standpoint, unsealed trim along exterior walls allows conditioned air to leak out and outside air to seep in. According to Energy Star guidelines for sealing air leaks, sealing gaps around baseboards, window frames, and door trim is a highly cost-effective way to reduce your heating and cooling bills. A $5 tube of caulk can easily pay for itself in energy savings during a single harsh winter month.
What is the Best Caulk for Baseboards?
Walking down the adhesive aisle at a big box hardware store can be overwhelming. You will see dozens of tubes claiming to be the best, but choosing the wrong formula will ruin your project. For baseboards and interior trim, you want exactly one thing: paintable acrylic latex caulk.
Acrylic latex is water-based, which means it cleans up easily with a damp rag, has very low odor, and dries quickly. More importantly, it accepts interior wall paint perfectly. You can usually find a high-quality tube for $4 to $8 at any hardware store.
When I remodeled my 1950s living room a few years ago, I accidentally grabbed a leftover tube of clear bathroom silicone instead of my acrylic latex. I didn't realize the mistake until I tried to brush on my semi-gloss trim paint. The paint separated and slid off the silicone like water off a duck's back. I spent three miserable hours carefully scraping and cutting the silicone out of the gap with a utility knife before I could start over. Save yourself the headache and check the label for the word "paintable."
If you want a slight upgrade, look for siliconized acrylic latex. This formula blends the easy cleanup and paintability of acrylic with a tiny amount of silicone for added flexibility. It stretches better than standard latex, making it ideal for homes that experience significant temperature swings or heavy foundation settling.
Essential Tools for a Clean Job
You do not need a massive toolbox to caulk trim, but spending a few extra dollars on the right gear makes a massive difference.
- A Dripless Caulk Gun: Do not buy the $3 stamped-metal skeleton gun. Spend $15 to $25 on a heavy-duty "dripless" or "no-drip" caulk gun. These guns automatically release the pressure on the plunger the second you let go of the trigger, stopping the caulk from continuing to ooze out of the tip.
- Utility Knife: A sharp blade is required to cut the plastic nozzle cleanly.
- A Damp Cotton Rag: This is your eraser and your cleaning station. An old cotton t-shirt works perfectly.
- A Small Cup of Water: Essential for the smoothing process.
- Painter's Tape (Optional): Useful if you are worried about smearing caulk too far up the wall.
Step-by-Step: How to Caulk Baseboards Perfectly
The secret to a flawless finish is preparation and pacing. Do not try to caulk an entire room in one continuous sprint. Work in manageable three- to four-foot sections so the caulk does not begin to dry before you have a chance to smooth it.
- Clean the surface thoroughly. Wipe down the top of the baseboard and the lower wall with a damp rag to remove dust, pet hair, and grime. Caulk will not stick to a dusty surface. Let it dry completely.
- Tape the wall (optional). If you are a beginner, run a strip of painter's tape along the wall about 1/16 of an inch above the baseboard. This gives you a hard boundary and prevents wide smears.
- Cut the nozzle at a 45-degree angle. Use your utility knife to slice the tip of the plastic nozzle. Aim for a tiny opening, about 1/8 of an inch wide. It is always better to cut it too small and enlarge it later than to cut it too big and flood the wall with caulk.
- Puncture the inner seal. Most caulk tubes have a foil seal inside the base of the nozzle. Push a long nail or the puncture wire attached to your caulk gun down the nozzle to break this seal.
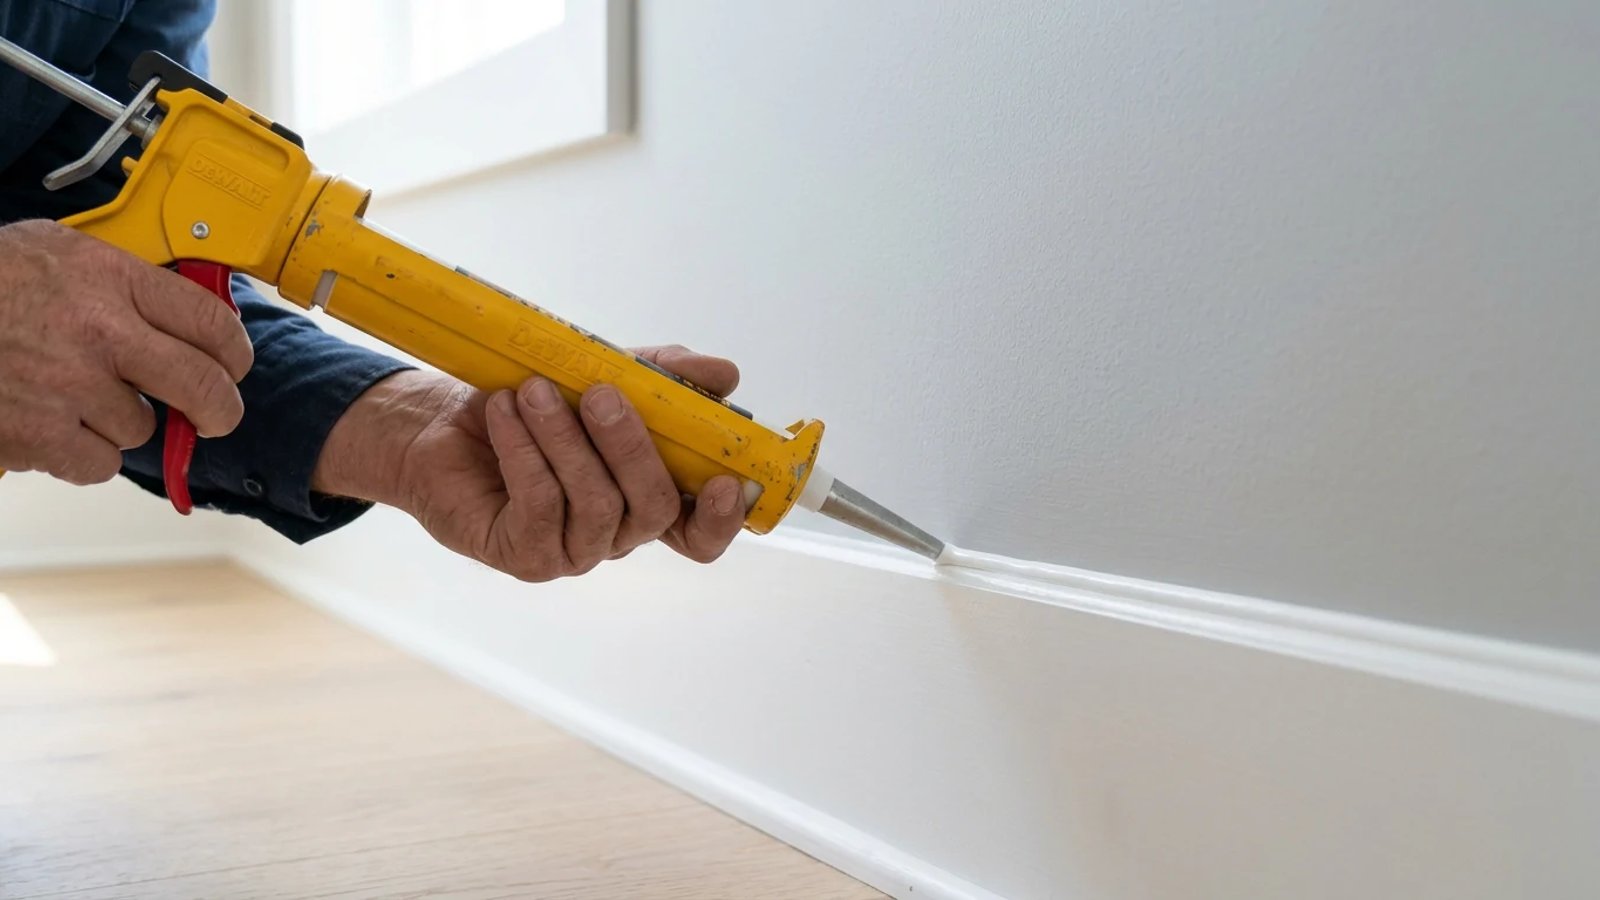
- Apply a consistent bead. Hold the gun at a 45-degree angle to the gap. Squeeze the trigger gently and move the gun steadily along the gap. You want a thin, uniform line of caulk sitting right in the corner where the wood meets the wall.
- Smooth the bead immediately. Dip your index finger into your cup of warm water. Lightly drag your wet finger over the fresh caulk line in one continuous motion. The water prevents the caulk from sticking to your skin, forcing it down into the gap and leaving a concave, factory-smooth finish.
- Wipe your finger and repeat. Excess caulk will build up on your finger. Wipe it off on your damp rag, re-wet your finger, and continue smoothing.
- Remove the tape while wet. If you used painter's tape, pull it off immediately at a sharp angle while the caulk is still wet. If you wait for the caulk to dry, the tape will peel the caulk right off the wall.
Should You Tape the Baseboards Before Caulking?
Taping the wall before caulking is a debated topic among painters. Professionals rarely use tape because they have the muscle memory to lay down a perfect 1/8-inch bead and smooth it flawlessly every time. For DIYers, tape acts as training wheels.
If your walls are heavily textured, tape is highly recommended. Textured drywall grabs onto excess caulk, making it incredibly difficult to wipe away smears. The tape protects the texture. The downside of using tape is that it leaves a microscopic ridge where the tape was lifted. You can gently pat this ridge down with a wet finger immediately after removing the tape, but it requires a delicate touch.
The difference between a messy caulk job and a professional finish usually comes down to the size of the hole cut in the nozzle. Keep it small.
How Do You Handle Wide Gaps and Corners?
Sometimes you run into a gap that is simply too wide for a standard bead of caulk. If the gap between your baseboard and the wall is wider than 1/4 inch, pumping it full of caulk is a bad idea. The caulk will shrink as it dries, sinking deep into the wall and cracking.
To fix wide gaps, you need a foam backer rod. This is a cheap, flexible rope made of extruded foam that you can buy in rolls at the hardware store. Push the backer rod into the wide gap using a putty knife until it sits just below the surface of the trim. The foam fills the deep void, giving your thin bead of caulk a solid surface to rest against.
Corners require a slightly different approach. For inside corners (where two walls meet), run your bead of caulk directly into the corner from both directions, then push your wet finger deep into the corner to smooth the transition. For outside corners (like the edge of a wall jutting into the room), use extremely light pressure. Outside corners have very little surface area for the caulk to grip, so a heavy hand will wipe the caulk away entirely.
Taking the time to properly caulk your baseboards transforms the look of a room. It blocks drafts, keeps pests in the walls where they belong, and creates a crisp canvas for your trim paint. By cutting a small nozzle hole, using the wet-finger technique, and keeping a damp rag handy, you can achieve results that look like you hired a veteran painter.
- Never use 100% silicone on trim; it cannot be painted and will ruin your finish.
- A damp rag and a cup of water are just as important as the caulk gun itself.
- If your gap is wider than a quarter inch, insert a foam backer rod before caulking to prevent the caulk from sinking inside the wall.