Oven Not Heating? Safe Checks Before Calling a Pro
Is your gas or electric oven failing to heat up? Learn the safe, simple troubleshooting steps you can take before paying for a professional repair.
Full guide Appliances Learn how long your home appliances will last and when to repair or replace them.You’ve prepped dinner, set the temperature dial, and waited. But 20 minutes later, you open the door to find the air inside your stove completely cold. An oven not heating is a frustrating roadblock that immediately derails your evening plans. Before you assume you need to buy a brand new appliance or pay for an emergency weekend service call, there are several safe, straightforward checks you can perform.
Troubleshooting a cold oven usually comes down to isolating the problem between power supply, heating components, or the control board. Whether you are cooking with gas or electricity, identifying the root cause often requires nothing more than a flashlight and a few minutes of your time.
The Golden Rule: Gas Safety First
Before we touch any dials, open any panels, or pull the stove away from the wall, we need to establish a strict safety boundary. If you own a gas range, the fuel source demands absolute respect.
Natural gas and liquid propane are highly combustible. The odorant added to the gas is there specifically to warn you of a leak before it reaches a dangerous concentration. According to the National Fire Protection Association (NFPA), any suspected gas leak requires immediate professional intervention. Homeowner troubleshooting is strictly reserved for situations where there is absolutely no smell of gas in the home. Always ensure you have a working carbon monoxide detector installed on every level of your home, especially when operating gas appliances.
Additionally, while diagnosing a problem is a great way to save money, repairing gas valves, burner tubes, and heat exchangers is strictly professional territory. A botched DIY job on a gas line can result in slow leaks or carbon monoxide buildup in your home. We will focus entirely on safe, external, and visual checks.
Why Is My Electric Oven Not Heating?
Electric ovens are heavy-duty appliances that require a significant amount of electricity to generate heat. If the oven is completely cold, the issue is almost always a disruption in that electrical path.
The 240V Breaker Illusion
One of the most common points of confusion for homeowners is seeing the oven clock illuminated while the oven itself refuses to heat. This happens because of how electric ranges are wired into your home's electrical panel.
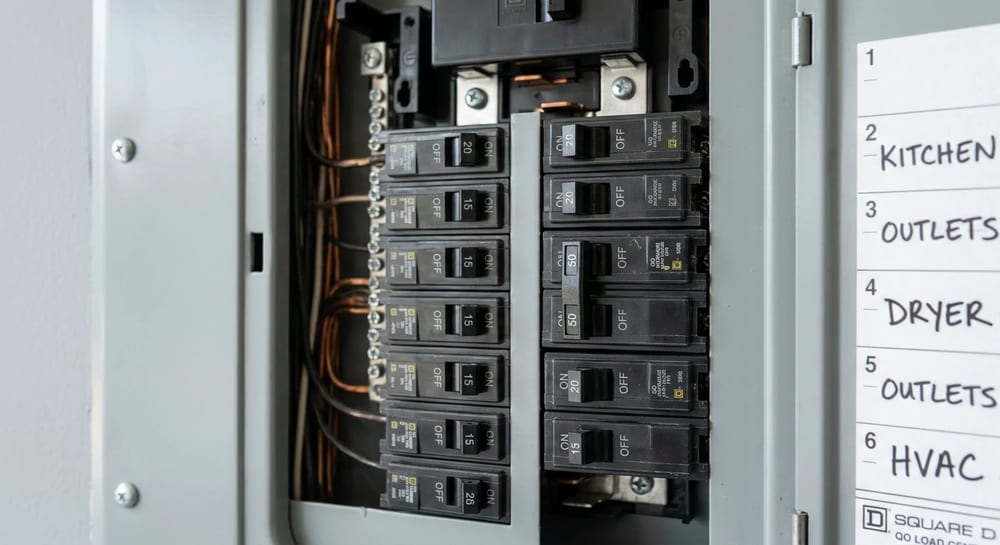
Your electric oven runs on a 240-volt circuit, which is supplied by a large, double-pole breaker in your electrical panel. This breaker essentially consists of two 120-volt switches tied together. The clock, control board, and interior light usually run off just one of those 120-volt legs. The heavy-duty heating elements require both legs to provide the full 240 volts.
If only one side of that double-pole breaker trips—or if the breaker trips internally but the handle doesn't swing all the way to the "off" position—the clock will stay on, but the elements will remain cold. I tested a client's oven last year where they were entirely convinced the control board was fried. It turned out to be a half-tripped breaker, and resetting it took ten seconds.
- Locate your main electrical panel. Find the large double-pole breaker labeled "Range" or "Oven."
- Look for misalignment. Check if the breaker handle is sitting slightly out of line with the other breakers, or resting in the middle position.
- Reset the breaker completely. Push the breaker firmly all the way to the "Off" position until you hear a click, then push it firmly back to the "On" position.
- Test the oven. Set the oven to bake and wait three minutes to see if the element begins to radiate heat.
Inspecting the Bake Element
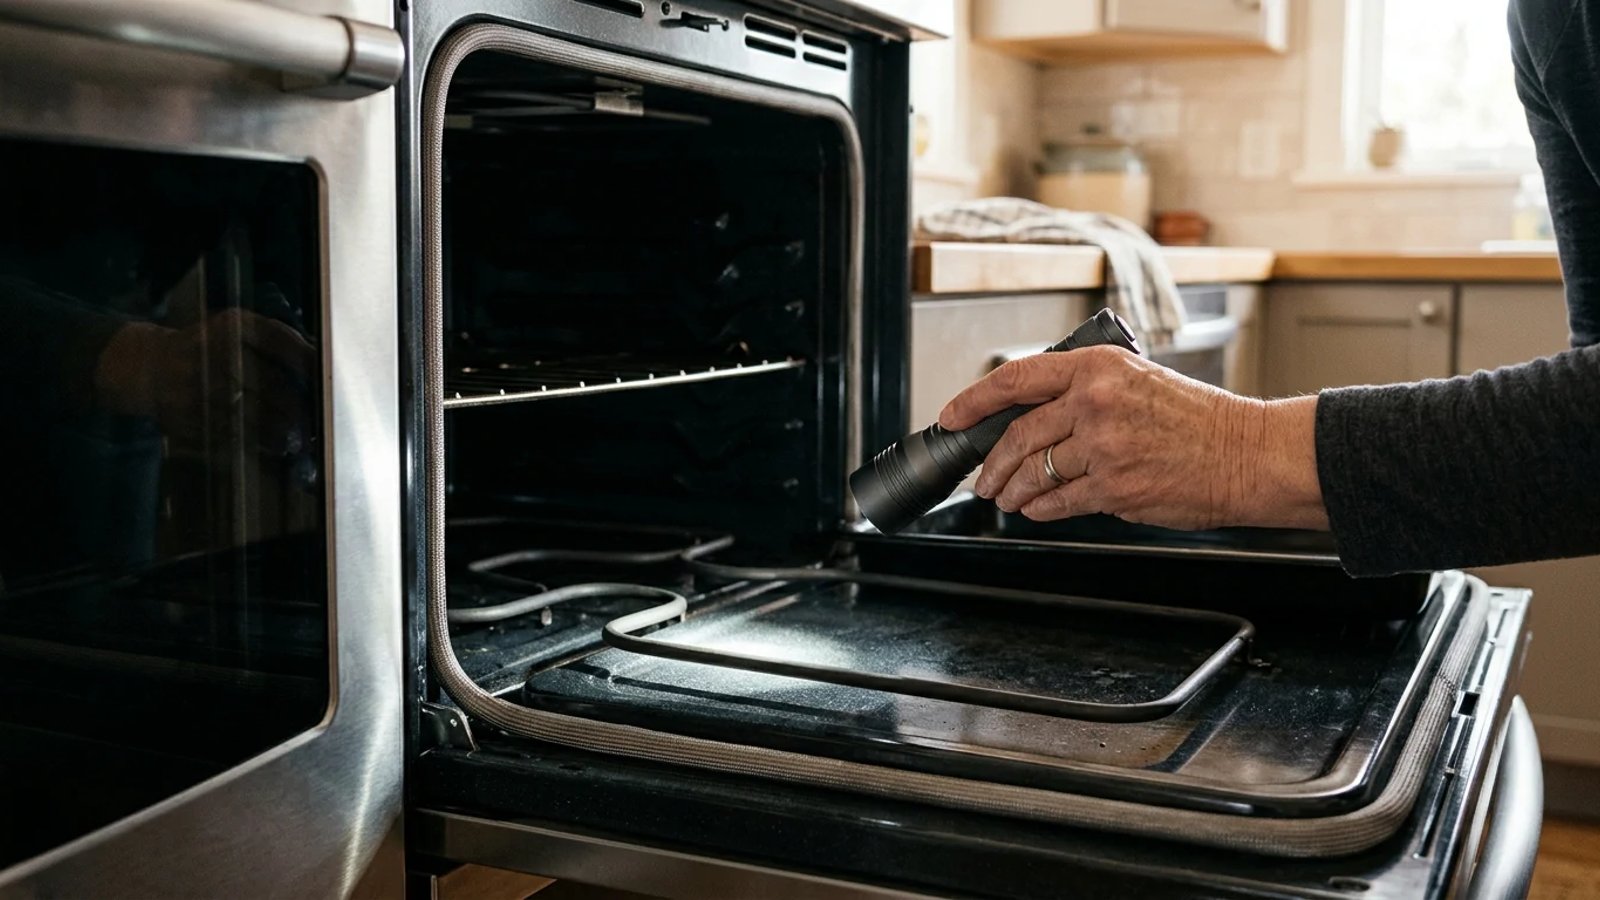
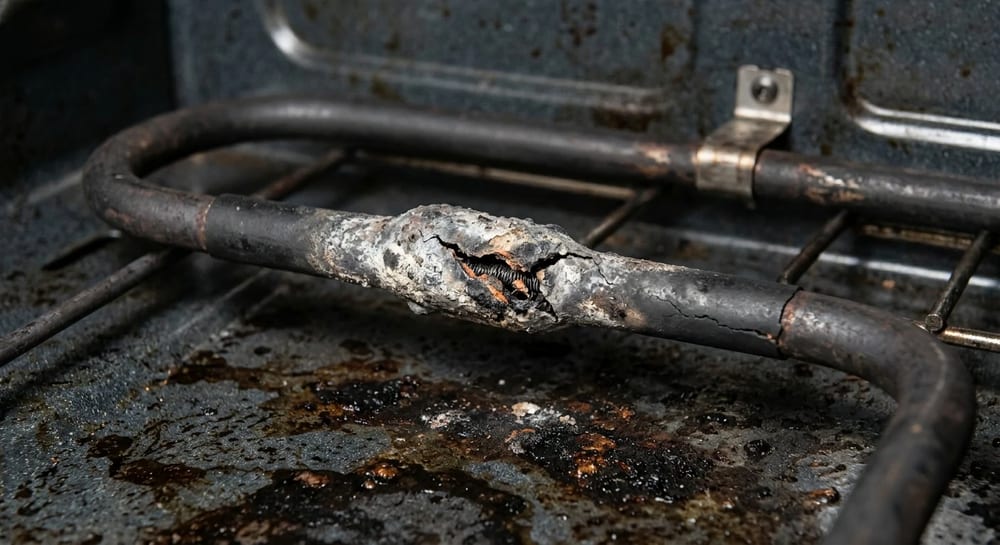
If the breaker is functioning correctly, the next most likely culprit is a burned-out bake element. The bake element is the thick, black, tubular metal piece located at the bottom of the oven cavity. In some modern ovens, this element is hidden beneath the floor panel, but in most standard models, it is fully exposed.
These elements work by forcing electricity through a high-resistance wire encased in a metal sheath packed with magnesium oxide insulation. Over time, the constant expansion and contraction from intense heat can cause the internal wire to break and short out against the outer sheath. When this happens, the element fails instantly, often with a bright flash and a popping sound.
You can usually diagnose a failed element with a simple visual inspection.
- Grab a bright flashlight. Shine it directly onto the entire length of the lower heating element.
- Look for physical damage. Scan the metal tube for bubbling, blisters, white powdery burn spots, or areas where the metal has completely melted and broken apart.
- Check the broil element. Look up at the top of the oven cavity and inspect the broil element for the same signs of damage.
Checking the Temperature Sensor
Both gas and electric ovens rely on a small component called a temperature sensor, or RTD (Resistance Temperature Detector), to monitor the heat inside the cavity. You will find this sensor sticking out from the upper back wall of the oven interior. It looks like a thin, silver metal probe, about three to four inches long.
The sensor sends a resistance reading to the control board. As the oven gets hotter, the resistance changes. If the sensor fails, it might tell the control board that the oven is already at 500 degrees when it is actually at room temperature. The control board responds by shutting off the heat.
While testing the exact resistance requires a multimeter (a working sensor usually reads around 1,080 ohms at room temperature), you can do a quick visual check. Look to see if the probe is bent, broken, or touching the interior wall of the oven. If the sensor is physically damaged, it must be replaced before the oven will heat properly.
Troubleshooting a Gas Oven Not Heating
Gas ovens operate on an entirely different mechanical principle. Instead of pushing electricity through a thick metal element, a gas oven uses a small electrical component to ignite a stream of natural gas or propane.
The Glowing Ignitor Test
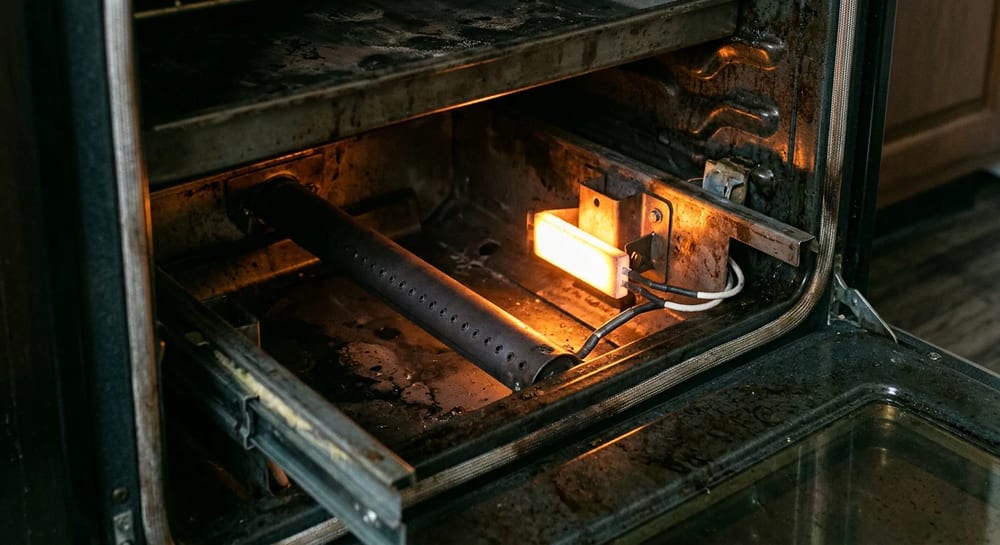
The most common reason a gas oven fails to heat is a weak or failing bake ignitor. The ignitor is a rectangular or cylindrical component located right next to the burner tube under the floor of the oven. It serves two purposes: it gets hot enough to ignite the gas, and it acts as a safety mechanism to ensure gas only flows when there is a heat source ready to light it.
When you turn the oven on, the ignitor begins to draw electrical current and glows bright orange. The gas safety valve is wired in series with this ignitor. The valve contains a bimetal switch that will only open if the ignitor draws a specific amount of electrical current—usually between 3.2 and 3.6 amps.
As ignitors age, their internal resistance increases. They might still glow orange, but they fail to draw enough electrical current to trigger the gas valve to open. This is a classic symptom: you see the glow, but you never hear the "whoosh" of the gas igniting.
- Remove the bottom panel. In most gas ovens, you can lift out the bottom metal floor panel to expose the burner tube and ignitor.
- Turn the oven on. Set the oven to a standard bake temperature (e.g., 350 degrees).
- Observe the ignitor. Watch the ignitor closely. It should begin to glow brightly within a few seconds.
- Listen for the gas. Within 60 to 90 seconds of the ignitor glowing, you should hear the gas valve click open, followed immediately by the burner lighting.
If the ignitor glows for several minutes but the gas never ignites, the ignitor is almost certainly weak and needs to be replaced. If the ignitor does not glow at all, it is completely dead, or the control board is failing to send it power.
When Should I Call an Appliance Professional?
If you have checked the breakers, inspected the electric elements for damage, or observed a glowing gas ignitor that refuses to light the burner, you have completed the safest and most effective troubleshooting steps available to a homeowner.
Going deeper into appliance repair requires pulling the heavy unit away from the wall, testing live electrical circuits with a multimeter, and navigating complex wiring schematics. If your visual checks don't reveal an obvious, easily replaceable part like a damaged bake element, it is time to bring in an expert.
When you call to schedule a repair, giving the technician accurate information can save you time and money. Professional appliance technicians carry hundreds of parts in their vans, but they cannot carry everything. If they know what to expect before they arrive, they are much more likely to fix your oven on the first visit.
Have this information ready when you make the call:
- The exact model number: This is usually found on a sticker around the frame of the oven door, inside the bottom drawer, or on the back of the unit.
- The fuel type: Specify whether it is a gas, electric, or dual-fuel range.
- The specific symptoms: Tell them exactly what is happening. For example, "The digital display works, but the bake element remains completely cold," or "The gas ignitor glows orange, but the burner never lights."
- Any error codes: If the digital display is flashing a code (like F9 or E1), write it down and relay it to the dispatcher.
Providing a repair technician with specific symptoms and your exact model number dramatically increases the chances they will fix your oven on the very first visit.
Dealing with an oven not heating is incredibly inconvenient, especially if you rely on home-cooked meals to keep your household running smoothly. By taking a few minutes to safely inspect the breakers, the heating elements, and the ignitor, you can often identify the problem yourself. Even if the fix requires a professional, your troubleshooting efforts ensure you know exactly what you are dealing with, allowing you to get your kitchen back in working order as quickly as possible.
- A working oven display does not mean the heating components are receiving the correct voltage.
- Visual inspections are the safest and most effective first step for homeowners troubleshooting a cold oven.
- A glowing gas ignitor can still be faulty if it doesn't draw enough electrical current to open the gas safety valve.
- Providing a repair technician with specific symptoms and your appliance model number saves time and money on service calls.