How to Install Hurricane Shutters to Protect Windows
Learn how to protect your home's windows from high winds and flying debris. This guide covers prepping permanent accordion shutters and safely boarding up windows with plywood.
Full guide Windows & Doors Learn how to spot energy leaks, fix drafts, and decide when to replace your windows and doors.Late-summer storms bring a unique kind of anxiety to homeowners in coastal and storm-prone areas. As weather reports track approaching systems, the window of time to secure your property shrinks rapidly. High winds and flying debris pose a massive threat to exposed glass, and a broken window during a severe storm is more than just a mess—it alters the internal pressure of your home, which can lead to catastrophic structural damage. Knowing exactly how to install hurricane shutters is one of the most critical skills a homeowner can possess.
Whether your home is already equipped with permanent metal shutter systems or you are scrambling to build an emergency barrier out of wood, the goal is the same: protect the building envelope. This guide will walk you through the process of deploying permanent accordion shutters and provide a detailed, step-by-step tutorial on building and installing emergency plywood window protection. By tackling this project systematically, you can secure your glass, stabilize your home's internal pressure, and weather the storm safely.
Evaluating Your Hurricane Window Protection Options
Before a storm is bearing down on your region, take a realistic inventory of your home's current defenses. Window protection generally falls into two categories: permanent fixtures and temporary deployments. Permanent systems, such as roll-down metal shutters, Bahama awnings, and accordion shutters, are bolted directly to the home's exterior year-round. They are highly convenient, requiring only a few minutes per window to deploy. If you recently purchased a home with these systems, your primary job is maintenance and deployment.
Temporary systems include corrugated aluminum storm panels and DIY plywood boards. Corrugated panels are lightweight and incredibly strong, usually sliding into pre-installed tracks or mounting onto permanently installed hanger bolts. Plywood, on the other hand, is the universal fallback. Typically 5/8-inch thick, it is relatively inexpensive, readily available at any hardware store (until panic buying sets in), and highly effective if installed correctly. If you do not have a manufactured system in place, building plywood shutters is your best line of defense.
According to official hurricane preparedness guidelines from Ready.gov, protecting your windows is a non-negotiable step in storm prep. When wind enters a home through a shattered window, it creates an extreme upward pressure on the roof and an outward pressure on the walls. Keeping the glass intact is what keeps the roof over your head.
How Do I Prep and Lock Accordion Shutters?
Accordion shutters are incredibly popular in storm-prone regions because they offer excellent protection and can be deployed by a single person in minutes. However, because they sit exposed to the elements year-round, the tracks can accumulate dirt, dead insects, and salt corrosion. If you wait until the wind is howling to test them, you might find them jammed or the locks seized.
Here is how to properly prep and deploy accordion shutters before the weather turns severe:
- Clear the tracks. Use a stiff-bristled brush or a shop vacuum to remove dirt, leaves, and wasp nests from both the upper and lower tracks.
- Lubricate the wheels. Spray a dry clear silicone lubricant into the tracks and on the wheels. Never use a heavy grease or WD-40, as these will attract dust and create a sticky sludge over time.
- Pull the shutters closed. Stand in the center of the window and pull both sides of the accordion shutter toward you until they meet in the middle. They should glide smoothly.
- Engage the locking pins. Most accordion shutters have a central locking mechanism. Push the locking pins into place to secure the two halves together.
- Lock the core. If your shutters have a key lock or a push-button tumbler, engage it now. Give the handles a firm tug to ensure the mechanism is fully seated and will not vibrate loose in high winds.
If your shutters are extremely difficult to pull, the nylon wheels inside the top track may have degraded from UV exposure and will need to be replaced. This is a simple DIY fix during the off-season, but during an emergency, you may need to use significant force to pull them shut.
Step-by-Step: How to Install Hurricane Shutters Using Plywood
If you do not have permanent shutters, plywood is your best option. However, slapping a thin piece of wood over a window with a few drywall screws is a recipe for disaster. High winds will easily rip improperly secured wood right off the wall, turning your protection into a dangerous projectile.
A few years ago, I tested three different types of masonry anchors on a brick exterior while helping a friend board up before a Category 3 storm. We quickly learned that precision measuring and the right hardware are the difference between a board that holds firm and one that rips out of the mortar. You must anchor the wood into the structural framing of the house, not just the decorative trim.
Follow these steps to ensure your plywood shutters are cut, drilled, and mounted securely.
- Measure for a structural overlap. Measure the width and height of the window opening, then add 8 inches to both dimensions. This ensures the plywood overlaps the wall by 4 inches on all sides, allowing you to drive screws into the home's solid framing studs rather than the fragile window trim.
- Cut the plywood to size. Using a circular saw, cut your 5/8-inch CDX plywood to the exact measurements. Label the back of each board (e.g., "Master Bedroom Left") with a permanent marker so you know exactly where it goes next time.
- Pre-drill the anchor holes. Lay the plywood flat on the ground. Drill clearance holes around the entire perimeter of the board, spacing them exactly 12 to 16 inches apart. Keep the holes about 2 inches in from the edge of the wood to prevent splitting.
- Mark the wall for drilling. Hold the pre-drilled plywood over the window (this usually requires two people). Use a pencil or a smaller drill bit to mark the wall through the holes you just drilled in the wood.
- Drill the pilot holes into the wall. Remove the wood. If you have a wood-framed house, drill standard pilot holes. If you have a brick or stucco home, use a hammer drill and a masonry bit to drill holes for your concrete anchors.
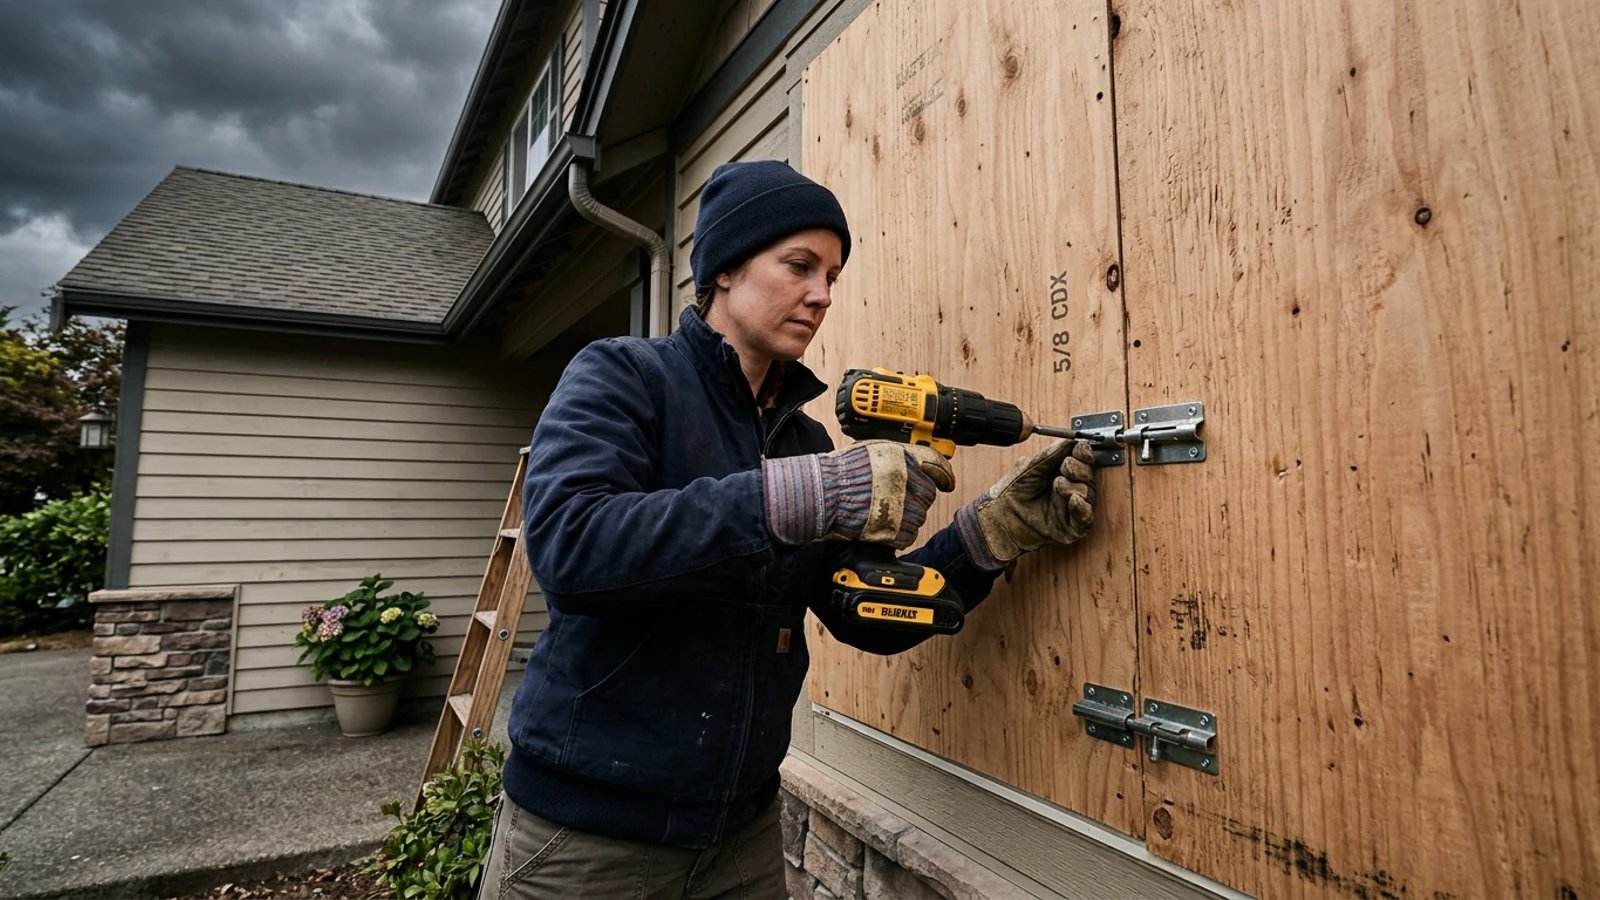
- Mount and secure the board. Lift the plywood back into place. Drive your heavy-duty screws or masonry anchors through the wood and into the wall. Ensure every single screw is driven flush and tight against the plywood.
If your windows are set deep into the exterior wall (common in stucco homes), you can use heavy-duty barrel bolts. Cut the plywood to fit snugly inside the window inset, attach the barrel bolts to the four corners of the wood, and drill receiving holes directly into the masonry sides of the window recess. This creates a flush, incredibly strong barrier.
Common Boarding Mistakes That Leave Windows Vulnerable
When homeowners are rushing to figure out how to install hurricane shutters at the last minute, mistakes are inevitable. Unfortunately, some of these common errors completely negate the protection the shutters are supposed to provide.
The most persistent and dangerous myth is that taping your windows with masking tape or duct tape will protect them. Tape provides zero structural integrity against wind pressure or flying debris. If a taped window is struck, the glass will still shatter, but the tape will hold the shards together in large, heavy, guillotine-like pieces that can cause severe injury. Skip the tape entirely; it is a waste of time and creates a false sense of security.
Another frequent mistake is using the wrong wood. Oriented Strand Board (OSB) or thin 1/2-inch plywood might be cheaper, but they are highly susceptible to moisture and impact. In a severe storm, driving rain will cause OSB to swell and degrade rapidly, while thin plywood will simply flex and shatter if hit by a flying tree branch. Stick strictly to 5/8-inch or 3/4-inch exterior-grade plywood.
Finally, do not forget the largest opening in your house: the garage door. High winds can easily buckle a standard garage door, allowing a massive rush of air into the home. If your garage door is not hurricane-rated, you must brace it from the inside using vertical 2x4s anchored to the floor and the header, or install a specialized garage door bracing kit.
Taking the time to measure accurately, buy the right hardware, and secure your boards into structural framing will give your home the best possible chance of weathering the storm intact. Once the weather clears and it is safe to go outside, remove the plywood promptly to allow natural light back in and ensure you have clear emergency exit routes from every room.
- Always use 5/8-inch or thicker exterior-grade plywood for emergency boarding; thinner wood will shatter under impact from flying debris.
- Measure plywood to overlap the window frame by at least 4 inches on all sides to ensure you are anchoring into the home's structural framing.
- Test the locking mechanisms on permanent accordion shutters early in the season, as salt air and debris can seize the locks over time.
- Label your emergency plywood boards with their corresponding window locations so you can deploy them quickly in future storms.