Best Paint Finish for Bathroom Walls and Ceilings
Choosing the right paint sheen for your bathroom is the difference between a lasting finish and peeling walls. Learn why satin and semi-gloss finishes offer the best moisture protection.
Full guide Interior: Paint, Drywall & Trim Learn how to patch drywall, choose the right paint, and update your interior trim.If you have ever watched paint peel in sheets above a shower, you know the frustration of a failed bathroom paint job. Bathrooms are the harshest environments in our homes. They undergo daily cycles of extreme humidity, temperature swings, and direct water contact. Finding the best paint finish for bathroom walls and ceilings is the only reliable way to stop moisture damage before it starts.
Many homeowners grab whatever leftover interior paint they have in the garage, assuming it will work just fine. Fast forward six months, and they are dealing with water streaks, bubbling drywall paper, and stubborn mildew. To get a finish that actually lasts, you have to match the paint chemistry and the sheen to the room's specific demands.
The Moisture Problem: Why Bathrooms Destroy Normal Paint
Every time you take a hot shower, steam fills the room. That steam eventually hits the cooler surfaces of your walls and ceiling, condensing back into liquid water. Standard flat interior paint—the kind builders typically use in bedrooms and living rooms—is highly porous. It acts like a giant sponge, absorbing that condensation directly into the drywall.
Standard flat paint acts like a sponge, absorbing moisture until it bubbles and peels.
Once moisture gets behind the paint film, the bond breaks. The paint starts to blister, and the damp, dark environment behind the paint film becomes a breeding ground for mildew. Even if you run your exhaust fan religiously, a standard flat finish simply cannot repel the sheer volume of water vapor a daily shower produces, which can be up to half a gallon of water vapor in a 10-minute shower.
What is the Best Paint Finish for Bathroom Walls?
In high-humidity areas, sheen is your primary defense. The sheen (or finish) dictates how much light the paint reflects, but more importantly, it dictates the porosity of the dried paint film. Higher sheens contain more resins and fewer pigments, creating a harder, slicker shell that water cannot easily penetrate.
For bathroom walls, you generally have two excellent options: satin and semi-gloss.
The Satin Finish
Satin is often considered the best paint finish for bathroom walls in half-baths, powder rooms, or guest bathrooms with good ventilation. It offers a soft, velvety glow that resists moisture much better than eggshell or flat paint. It is also forgiving; it will not highlight every drywall imperfection or patch job the way a glossier paint will. If your bathroom walls have a lot of texture or minor dents, satin strikes a great balance between durability and aesthetics.
The Semi-Gloss Finish
If you are painting a high-traffic family bathroom, a kids' bathroom, or a small space with poor ventilation, semi-gloss is the undisputed champion. It dries to a hard, durable shell that actively repels water. When condensation forms on a semi-gloss wall, it beads up and runs down rather than soaking in. You can easily wipe away water streaks, soap scum, or toothpaste splatters with a damp sponge without wearing away the paint.
Should I Use Flat Paint on the Bathroom Ceiling?
This is the most common mistake DIY painters make. Standard ceiling paint is ultra-flat. Manufacturers design it this way to hide drywall seams and diffuse light across large overhead spans. However, using standard flat ceiling paint in a full bathroom is a guaranteed recipe for peeling.
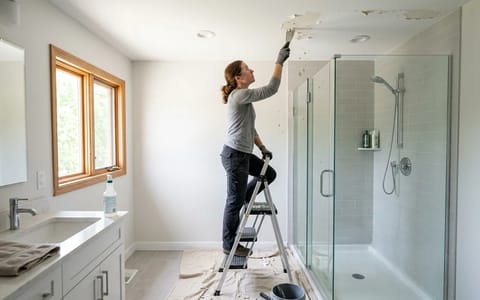
Steam rises. Your bathroom ceiling takes the absolute brunt of the heat and moisture during a shower. When we renovated our 1980s primary bath, I noticed the previous owners had used basic flat ceiling paint directly above the shower enclosure. Within two years of our moving in, it was flaking off in massive sheets, exposing the brown drywall paper underneath. We had to scrape it all back, skim coat the damage, and apply a premium satin finish. It hasn't peeled a single millimeter since.
At an absolute minimum, use a satin finish on your bathroom ceiling. If the ceiling is low or the shower is fully enclosed, stepping up to semi-gloss above the wet zone provides even better protection.
What Type of Paint Formula Actually Lasts?
Sheen is critical, but the underlying chemistry of the paint matters just as much. You want a 100% acrylic latex paint. Acrylic resins are highly flexible, meaning the paint film can expand and contract slightly as the bathroom heats up during a shower and cools down afterward. This flexibility prevents the micro-cracking that allows moisture to sneak behind the surface.
Historically, painters recommended oil-based paints for bathrooms because they dried to an impermeable, plastic-like shell. Today, high-quality water-based acrylics perform just as well without the noxious fumes, difficult cleanup, or the tendency to turn yellow over time.
Additionally, always check the label for mildewcide additives. Most quality bathroom paints are specifically formulated with antimicrobial agents that prevent mold and mildew spores from feeding on the paint film. While no paint can stop mold if you have an active plumbing leak, mildew-resistant paint will stop the surface growth caused by everyday condensation. For comprehensive guidelines on managing indoor moisture, the EPA provides authoritative standards on mold prevention that highlight the importance of non-porous surfaces.
Prep Work: The Hidden Step for Paint that Sticks
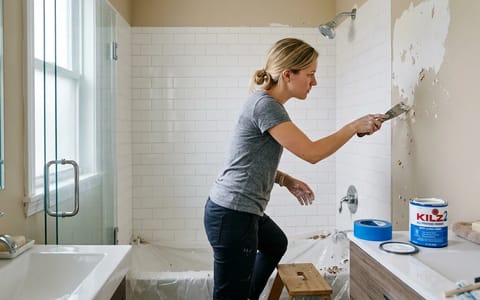
Even the most expensive, moisture-resistant semi-gloss paint will fail if you apply it over dirty, damp walls. Bathrooms accumulate a microscopic layer of aerosolized hairspray, soap residue, and body oils. Paint cannot bond to grease or soap scum.
Before you crack open that new can of paint, you have to prep the space properly. This usually takes about 30 to 60 minutes but guarantees your weekend project won't have to be repeated next year.
- Dry out the room. Do not use the shower for at least 24 hours before painting. The drywall must be bone dry.
- Wash the walls. Use a degreasing cleaner like TSP (Trisodium Phosphate) or a TSP substitute mixed with warm water to wipe down the walls and ceiling.
- Scuff sand glossy surfaces. If the existing paint is semi-gloss or glossy, lightly sand the walls with a 120-grit sanding sponge. This creates a microscopic "tooth" for the new paint to grip.
- Patch and smooth. Fill any nail holes or old towel-bar anchors with lightweight spackle. Let it dry, then sand it flush.
- Apply a moisture-blocking primer. Spot-prime your spackle patches. If you are painting over water stains or old mildew spots, coat the entire wall with a stain-blocking, mold-killing primer before applying your topcoat.
Getting the Job Done Right
Painting a bathroom is a low-cost, high-impact weekend project that instantly refreshes the space. By ditching the flat finishes and choosing a high-quality 100% acrylic latex in a satin or semi-gloss sheen, you are building a waterproof shield for your drywall. Take the time to clean the walls thoroughly, prime where necessary, and let the paint fully cure. Your walls will easily fend off the steam and splashes for years to come.
- Choose semi-gloss for high-traffic family bathrooms to easily wipe away streaks and soap scum.
- Use a satin finish on ceilings to prevent the peeling and flaking caused by rising steam.
- Invest in 100% acrylic latex formulas, which flex with temperature changes to prevent micro-cracking.
- Wait 24 hours after the last shower before painting so the drywall is completely dry.
- Allow up to 30 days for new latex paint to fully cure before scrubbing the walls.