Horizontal Foundation Cracks: What They Mean and How to Fix
Discovering a crack in your basement can be terrifying. Learn how to tell the difference between normal settling and serious structural threats, and exactly how to fix them.
Full guide Foundation & Structure Learn how to spot dangerous foundation cracks and protect your home from costly structural damage.Walking down into your basement and spotting a jagged line ripped across the concrete is enough to ruin anyone's week. Most homeowners immediately picture a collapsing house, heavy excavation equipment tearing up the yard, and a drained savings account. But before you panic, you need to look closely at the direction of the fracture, especially for concerning horizontal foundation cracks.
The orientation of a foundation crack tells a very specific story about what the soil outside is doing to your house. Not all cracks are equal. Some are simply the natural result of aging concrete, while others are blaring alarms that your home's structural integrity is failing.
What Causes Horizontal Foundation Cracks?
To understand why horizontal foundation cracks are so dangerous, you have to understand hydrostatic pressure. The dirt surrounding your basement isn't just sitting there; it acts like a giant sponge. When clay-heavy soil gets saturated with rainwater or melting snow, it expands dramatically. Water itself is incredibly heavy, weighing about 62.4 pounds per cubic foot. When the soil around your house fills with water, it creates massive lateral (sideways) pressure against your basement walls.
Your foundation was built to hold up the vertical weight of your house. It is remarkably strong under compression. However, concrete and mortar are relatively weak against lateral forces. When the outward pressure of the wet soil exceeds the inward strength of the wall, the concrete or mortar joints snap. This physical breaking point manifests as a horizontal crack, usually located midway up the wall.
A horizontal crack means the wall is literally being pushed inward into your basement. It is no longer plumb, and it has lost its structural ability to safely support the house above it.
A few years ago, we inspected a 1970s split-level where the back block wall had a horizontal crack running its entire 20-foot length. We measured a 2-inch inward bow using a standard plumb bob. The soil outside hadn't been graded properly since the house was built, and decades of trapped rainwater finally snapped the mortar joints. The fix required excavating the yard and installing steel I-beams—a massive expense that could have been avoided with a $20 downspout extension and proper grading.
Vertical vs. Horizontal vs. Floor Cracks
Evaluating your foundation means knowing exactly what you are looking at. Here is how to translate the language of concrete cracks.
Vertical and Diagonal Cracks
If you see a crack that runs straight up and down, or at a slight diagonal (less than 45 degrees), you are usually looking at a shrinkage crack. When a new poured-concrete foundation cures, the water inside it evaporates, causing the concrete to shrink slightly. This tension creates vertical hairline cracks, often within the first year of construction.
These cracks frequently let water seep into the basement during heavy rains, which is frustrating, but they do not typically threaten the structural stability of the house. They are a waterproofing problem, not a structural emergency.
Basement Floor Cracks
Basement floors are almost always poured as a "floating slab." This means the floor is just a thin layer of concrete resting on the dirt; it does not support the walls or the weight of the house above. When a basement floor cracks, it is usually because the soil beneath it has compacted or heaved. While floor cracks can allow moisture and radon gas to enter the home, they are strictly cosmetic and non-structural.
Stair-Step Cracks
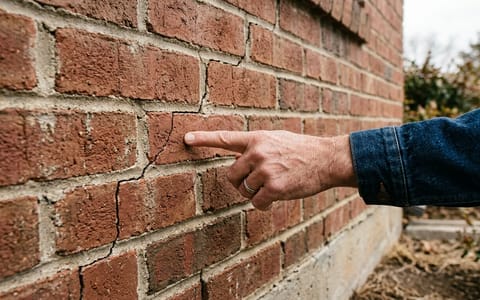
Stair-step cracks occur in concrete block or brick foundations. The crack follows the path of least resistance—the mortar joints—zigzagging up or down the wall. If a stair-step crack is wider than 1/4 inch, or if the wall is bulging, it indicates differential settlement (one side of the house is sinking faster than the other) or lateral soil pressure. This requires professional evaluation.
How to Inspect and Measure Your Foundation Crack
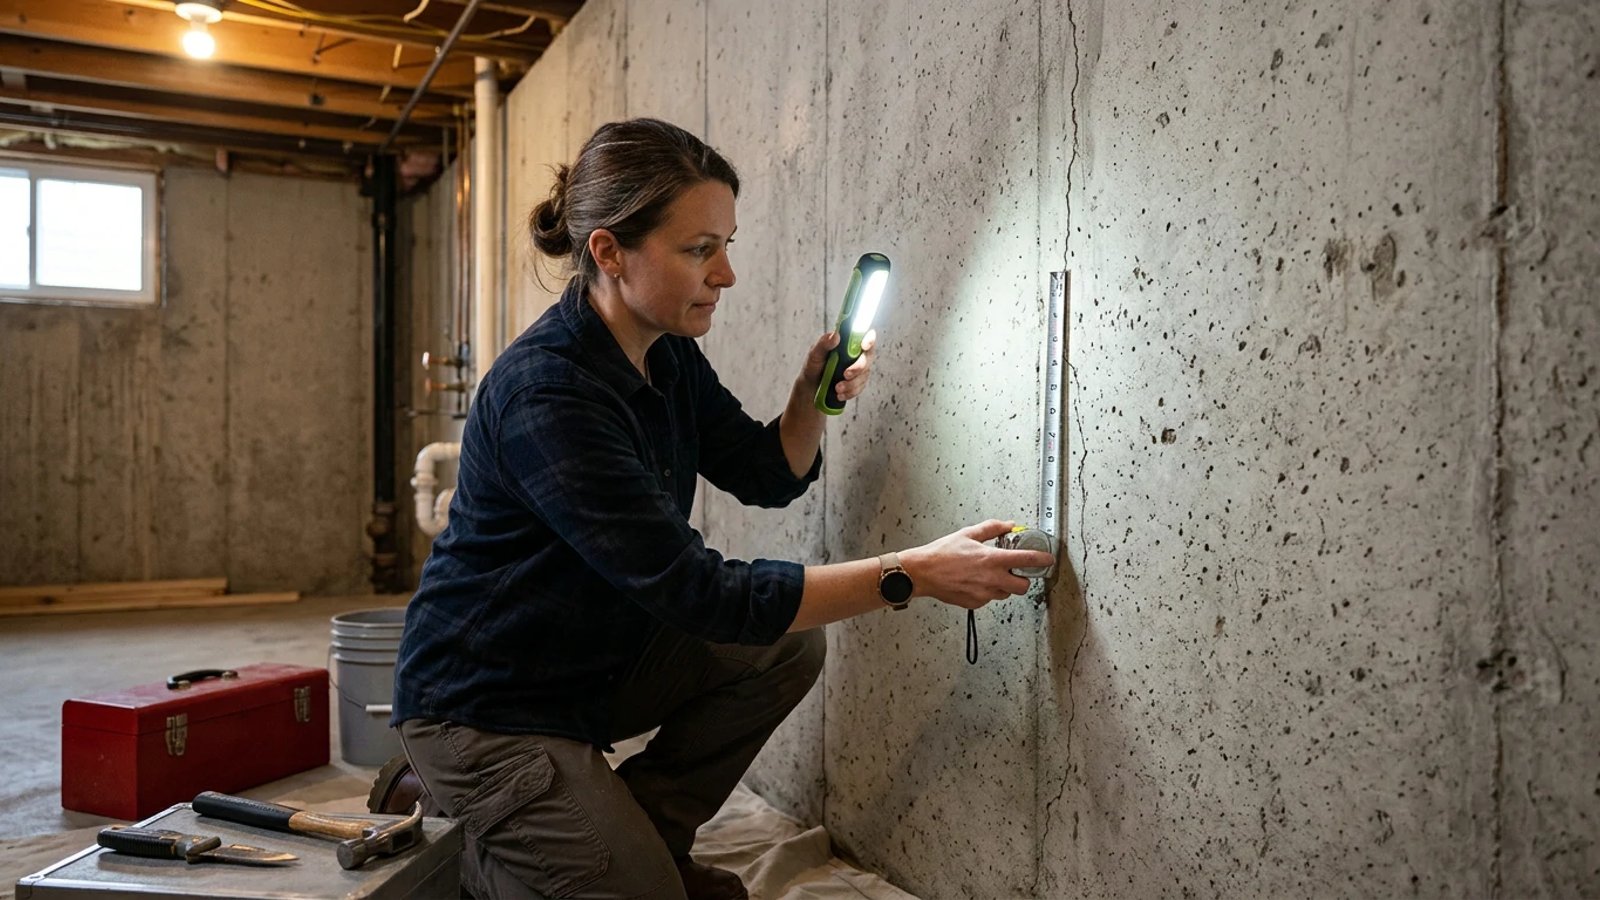
You cannot fix a problem until you understand its severity. If you find a crack, grab a tape measure, a pencil, and a 4-foot carpenter's level. Do not just eyeball it.
- Clean the surface area. Use a stiff wire brush to scrub away any white, powdery efflorescence or loose concrete flakes so you can see the true edges of the fracture.
- Measure the width. Place a ruler across the widest point. Anything under 1/8 inch is generally a standard settling crack. Anything wider than 1/4 inch warrants a call to an engineer.
- Check for wall bowing. Place your 4-foot level vertically against the wall, directly over the crack. If the bubble is not dead-center, or if the level rocks back and forth, the wall is bowing inward.
- Mark the crack tips. Draw a horizontal pencil line exactly where the crack ends on both the top and bottom, and write today's date next to the line. Check back in 30 days to see if the crack has grown past your marks.
- Install a crack monitor. For about $20 online, you can buy a clear acrylic crack monitor gauge. Epoxy it over the crack to track millimeter-level movement over the coming months.
A horizontal foundation crack is the physical breaking point where lateral soil pressure finally defeats the strength of your concrete wall.
DIY Repair for Vertical and Floor Cracks
If you have a vertical shrinkage crack that leaks during rainstorms, you can repair it yourself. The biggest mistake homeowners make here is buying a tub of hydraulic cement and smearing it over the surface.
Hydraulic cement dries rock-hard. Because your house naturally expands and contracts with seasonal temperature shifts, a rigid cement patch will eventually break loose, and the leak will return. Instead, you need to use a low-pressure injection kit. These kits cost between $50 and $150 at major hardware stores and take a few hours to apply over a weekend.
There are two types of injection materials: polyurethane foam and epoxy. Polyurethane expands up to 20 times its liquid volume to aggressively fill voids and stop active water leaks. It remains flexible, allowing it to move with the concrete. Epoxy, on the other hand, cures stronger than the concrete itself, effectively welding the crack back together, but it should only be used on completely dry cracks where structural binding is desired.
The process involves gluing plastic injection ports along the crack every 8 inches. You then cover the entire crack and the bases of the ports with a thick surface-sealing paste. Once the paste cures (usually 24 hours), you use a standard caulking gun to slowly inject the liquid polymer into the lowest port until it oozes out of the port above it. You cap the lower port, move up to the next one, and repeat until the crack is filled from bottom to top.
Why You Should Never DIY a Horizontal Foundation Crack
Horizontal foundation cracks cannot be fixed with epoxy, polyurethane, or caulk. Injecting a horizontal crack is like putting a band-aid on a broken leg—it hides the injury, but it does absolutely nothing to stop the thousands of pounds of soil pressure pushing the wall inward. Even a wall that has bowed inward by a mere 1/2 inch indicates a serious structural issue that requires professional intervention, not a DIY patch.
Because the wall has lost its structural integrity, it must be mechanically reinforced. If you ignore it or try a cheap surface patch, the bowing will worsen. Mortar joints will continue to fail, the wall will push further into the basement, and eventually, the foundation can collapse, taking the house down with it.
How Much Does Professional Foundation Wall Repair Cost?
The cost of professional foundation repair depends entirely on how far the wall has bowed inward. Catching the problem early saves thousands of dollars.
For walls that have bowed less than 2 inches, a contractor can usually install carbon fiber straps. These straps are epoxied vertically against the wall every 4 feet. Carbon fiber is incredibly strong and prevents the wall from bowing any further. This repair typically costs between $500 and $1,000 per strap, making a 20-foot wall cost roughly $2,500 to $5,000.
If the wall has bowed more than 2 inches, carbon fiber is no longer sufficient. The contractor will need to install steel wall anchors or steel I-beams. Wall anchors involve trenching the yard outside to bury heavy steel plates, which are then connected to plates inside the basement via steel rods tightened to pull the wall back into place. This method ranges from $400 to $700 per anchor.
In extreme cases where the wall is failing completely, the yard must be excavated down to the foundation footing, the wall pushed back into place or rebuilt, and the soil replaced with proper gravel drainage. This catastrophic repair easily runs $15,000 to $30,000 or more.
Fix the Root Cause First
Whether you inject a small vertical crack yourself or hire a crew to install steel beams, the repair will eventually fail if you do not fix the water problem outside. Hydrostatic pressure is entirely preventable.
Walk the perimeter of your house during the next heavy rain. Ensure your gutters are completely clear of debris and that water isn't spilling over the edges. Check your downspouts—they must discharge water at least 6 feet away from the foundation walls. Finally, look at the soil grading. The dirt around your house should slope downward away from the foundation, dropping at least 6 inches over the first 10 feet. Keeping the soil dry is the absolute best way to protect your foundation from cracking in the first place.
- Identify the crack direction first: vertical means settling, horizontal means structural bowing.
- Use a 4-foot level to check if your foundation wall is bowing inward.
- Seal leaking vertical cracks with a low-pressure polyurethane injection kit ($50-$150).
- Hire a licensed structural engineer—not a waterproofing salesperson—to evaluate horizontal or stair-step cracks.
- Prevent future foundation damage by extending downspouts 6 feet away from the house and grading soil downward.