How to Install Basement Insulation (And Stop Cold Drafts)
Stop cold floors and lower your heating bills by properly insulating your basement walls. Learn how to install rigid foam boards directly to concrete for a moisture-safe thermal barrier.
Full guide Foundation & Structure Learn how to spot dangerous foundation cracks and protect your home from costly structural damage.If your toes freeze the moment you walk across the main floor in the morning, a lack of proper basement insulation is likely the culprit. An unfinished, bare-concrete basement acts as a massive heat sink. It constantly pulls warmth out of your home and radiates cold air upward, forcing your furnace to work overtime just to maintain a baseline temperature. Effective basement insulation can solve this.
In my experience, when we insulated the basement in my 1970s split-level, the temperature difference upstairs was noticeable within 24 hours. The floors stopped feeling like ice rinks, and the basement itself jumped from a damp 55 degrees to a comfortable 65 degrees without adding any new heating vents.
Adding basement insulation is one of the most effective ways to lower your winter heating bills. But doing it wrong can cause thousands of dollars in water damage and mold remediation. Below, we cover exactly how to insulate your basement walls the right way, using rigid foam boards to create a dry, warm, and permanent thermal barrier.
Why is my basement so cold (and damp)?
Concrete is incredibly strong, but it is terrible at stopping heat transfer. It has an R-value (the measure of thermal resistance) of just 0.1 to 0.2 per inch. An 8-inch thick poured concrete foundation wall offers an R-value of less than R-2. By comparison, a standard modern 2x4 exterior wall sits around R-13 to R-15.
Worse, concrete is porous. It constantly wicks moisture from the wet dirt outside through capillary action. Even if your walls look dry, they are constantly releasing water vapor into your basement air, sometimes as much as 10-15 gallons a day in very damp conditions.
Because of this moisture drive, the ENERGY STAR guidelines and modern building codes strongly recommend using closed-cell rigid foam insulation against below-grade foundation walls.
Material Choices: Why Rigid Foam Wins
To successfully insulate a basement, the material must stop heat transfer while simultaneously handling moisture without degrading. Rigid foam board handles both jobs perfectly.
Trapping fiberglass against a raw concrete wall is a recipe for mold, not warmth.
When shopping at the hardware store, you will typically see three types of rigid foam. Here is how they stack up for basement applications:
- Expanded Polystyrene (EPS): The classic white "beadboard" foam. It is the cheapest option, offering about R-4 per inch. It is moisture-resistant but slightly more permeable than other options.
- Extruded Polystyrene (XPS): The pink or blue boards. This is the gold standard for DIY basement insulation. It provides roughly R-5 per inch and is highly moisture-resistant. A 2-inch thick board gives you an R-10 barrier.
- Polyisocyanurate (Polyiso): Often foil-faced, offering the highest R-value at roughly R-6 to R-6.5 per inch. However, it can absorb water over time if exposed to liquid moisture, making it less ideal for below-grade basement walls.
For most homes, 1.5-inch or 2-inch XPS foam boards offer the best balance of cost, thermal resistance, and moisture control.
How to Install Rigid Foam Basement Insulation
Installing rigid foam is a straightforward DIY project that requires basic hand tools. You will need a tape measure, a utility knife with snap-off blades, a straight edge, a caulking gun, foam-compatible construction adhesive, canned spray foam, and sheathing tape.
Once your walls are dry and structurally sound, follow these steps to install the foam.
- Clean the concrete walls. Use a stiff push broom to sweep away cobwebs, loose mortar, and dust so the adhesive can bond directly to the concrete.
- Measure and cut the foam boards. Measure the height of your wall and cut the foam board about 1/4-inch short to leave a small gap at the floor and ceiling. Score the foam with a utility knife along a straight edge, then snap it cleanly over your knee.
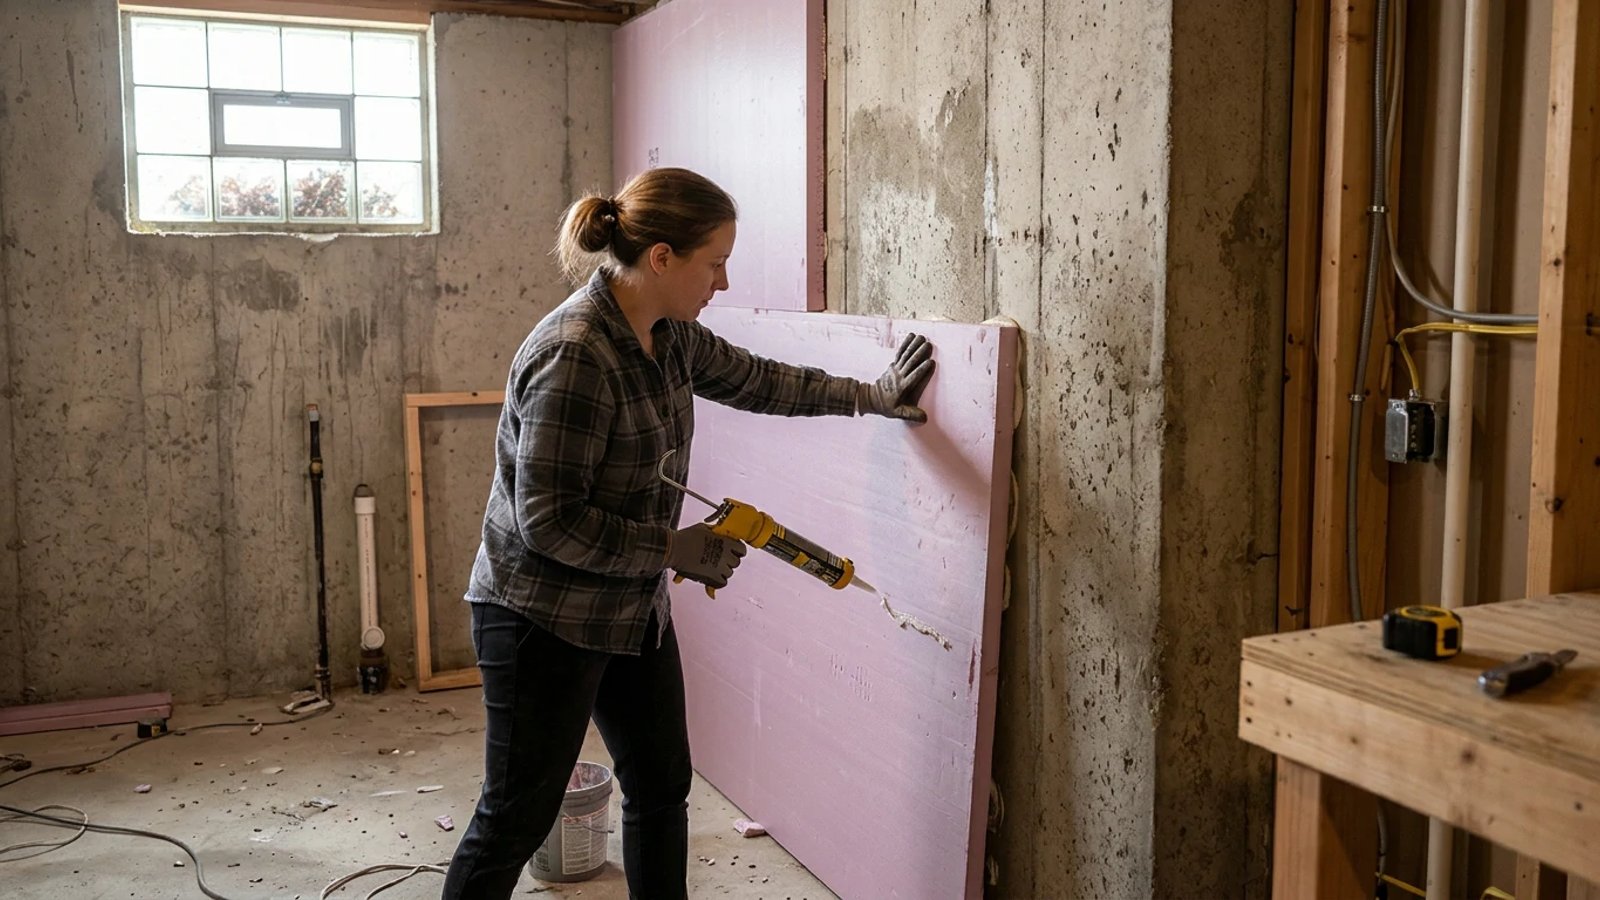
- Apply foam-safe adhesive. Load your caulking gun with a foam-compatible adhesive (like Loctite PL 300). Standard construction adhesives contain solvents that will literally melt the foam. Apply the adhesive in a wave pattern or in a grid of large dots across the back of the board.
- Press the board to the wall. Push the foam firmly against the concrete. Hold it for 30 to 60 seconds to allow the adhesive to grab. If the wall is slightly bowed, you may need to prop a 2x4 against the foam to hold it in place while the glue sets.
- Butt the next board tightly. Install the adjacent board, pushing the factory edges tightly against one another to minimize gaps.
- Tape the seams. Once the adhesive has cured (usually 24 hours), run a strip of high-quality sheathing tape (like Tyvek tape or Tuck Tape) down every vertical and horizontal seam. Use a plastic putty knife to press the tape flat and remove air bubbles.
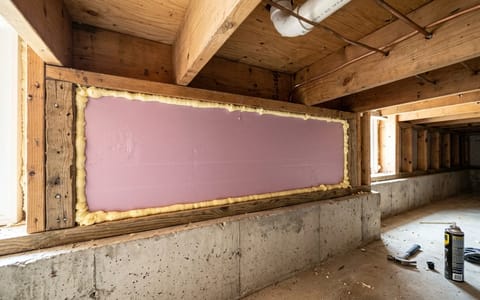
- Seal the perimeter edges. Use canned expanding foam (like Great Stuff Pro) to fill the 1/4-inch gaps you left at the floor, at the top of the wall, and around any basement windows.
By taping the seams and foaming the edges, you create a continuous, airtight thermal break. Indoor air can no longer reach the cold concrete, meaning condensation cannot form.
Next Steps: Framing and Finishing
Rigid foam is highly flammable and produces toxic smoke if it burns. Building codes require that foam insulation be covered by a 15-minute thermal barrier—typically 1/2-inch drywall. You cannot leave the foam exposed in a living space.
To hang drywall, you need to build a standard 2x4 stud wall in front of the foam. Construct the framing on the floor, lift it into place, and leave a 1/2-inch to 1-inch air gap between the back of the studs and the face of the rigid foam. This gap ensures the wall remains perfectly plumb even if the foundation is wavy.
If you want even more insulation, you can install unfaced mineral wool or fiberglass batts between the new 2x4 studs. Because the rigid foam is already blocking the moisture and the cold concrete, it is now perfectly safe to use standard batts in the stud cavities.
Costs, Savings, and 2026 Rebates
Insulating your basement is surprisingly affordable when you do the labor yourself. A 4x8 sheet of 2-inch XPS foam costs between $25 and $35 at most big-box hardware stores. Foam-compatible adhesive runs about $6 to $8 per tube, and you will use roughly one tube for every two boards.
While the upfront material cost hovers around $1,000, the energy savings start immediately. Homeowners frequently see their winter heating bills drop by 10% to 20% after sealing and insulating a leaky, uninsulated basement.
When budgeting for this project, be aware that the federal Energy Efficient Home Improvement Credit (Section 25C), which previously offered a 30% tax credit for insulation materials, ended on December 31, 2025. However, you should check with your state energy office and your local utility provider for current 2026 rebates. Many utility companies offer instant point-of-sale discounts or mail-in rebates for purchasing rigid foam and air-sealing materials.
Taking a weekend to glue and seal foam boards to your foundation walls is sweaty, dusty work. But the permanent fix it provides—stopping drafts, preventing mold, and keeping your main floor warm—pays comfort dividends for the entire life of the house.
- Never put fiberglass batts directly against raw concrete basement walls to avoid mold growth.
- Use 1.5 to 2-inch Extruded Polystyrene (XPS) foam boards for the best balance of R-value and moisture resistance.
- Seal every seam and gap with sheathing tape and expanding foam to completely block air leaks.
- Buy foam-compatible construction adhesive—standard construction adhesives will melt the insulation boards.