Why Tar Won't Seal a Chimney Flashing Leak (And What Will)
Slathering roofing tar over a leaking chimney joint might stop the drip today, but it guarantees severe wood rot tomorrow. Learn why face-sealing fails and how proper mechanical flashing actually works.
Full guide Roofing Learn how long shingles last, how to spot leaks early, and how to decide between a quick repair and a full roof replacement.You notice a brown water stain spreading across your ceiling right below the chimney, a common sign you might need to seal chimney flashing leak. Your first instinct is probably to grab a ladder, a putty knife, and a heavy bucket of roofing mastic to smother the problem. It makes sense on paper: if there is a hole, plug it. But trying to seal it with a thick layer of tar or standard caulk is one of the most destructive DIY mistakes you can make.
While slathering black mastic over the joint between your brick chimney and the roof deck might stop the drip for a few months, it sets off a chain reaction of hidden damage. Houses shift, wood expands, and bricks heat up in the afternoon sun. Within a single season, that rigid tar will crack, creating microscopic channels that pull water in and refuse to let it evaporate.
Last fall, I helped a neighbor scrape five layers of old roofing mastic off his chimney base. Underneath that thick black crust, the roof decking had turned to wet cardboard. He thought he was fixing the leak every single year by adding more tar, but he was actually trapping the moisture inside the wood. If you want a dry house, you have to stop thinking about glue and start thinking about gravity.
Why Roofing Tar Won't Seal Chimney Flashing Leak?
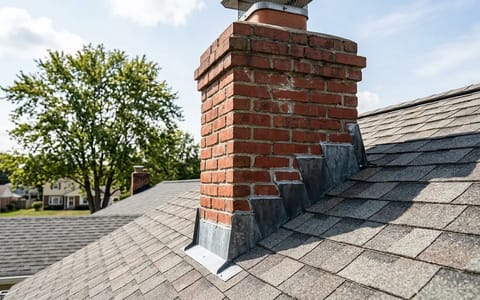
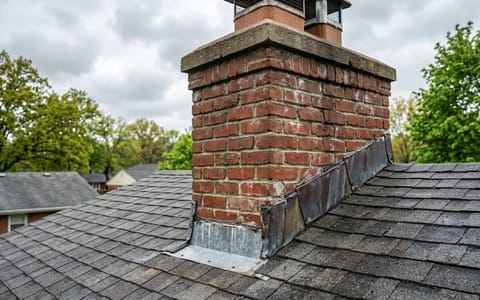
To understand why face-sealing fails, you have to look at the environment your chimney lives in. A chimney is a heavy, rigid column of masonry that sits on its own foundation. The roof surrounding it is built of wood framing that flexes with wind loads, sags slightly under heavy snow, and expands with seasonal humidity. These two structures move independently.
When you attempt to seal a chimney flashing leak by applying a thick bead of roofing tar, silicone caulk, or rubberized spray across that intersection, you are asking a thin chemical membrane to hold two moving structures together. It never works. The constant micro-movements, often just a few millimeters, tear the sealant apart. Additionally, asphalt-based roofing tar breaks down rapidly under direct ultraviolet sunlight. It dries out, turns brittle, and shrinks away from the brick.
This trapped moisture is far more dangerous than the original minor leak. A small drip might spot your ceiling drywall, but trapped moisture rots the structural plywood and rafters holding up your roof. By the time you notice the rot, you are looking at a massive carpentry repair bill instead of a simple flashing adjustment.
The Anatomy of a Dry Chimney: Mechanical Flashing
If sealants and tar are not the answer, how is a chimney supposed to stay dry? The answer is mechanical flashing. Proper roofing relies entirely on gravity and overlapping materials to shed water. Think about how fish scales or asphalt shingles work. The layer above overlaps the layer below, so water simply cascades down. Chimney flashing uses the exact same principle, broken into a two-part system.
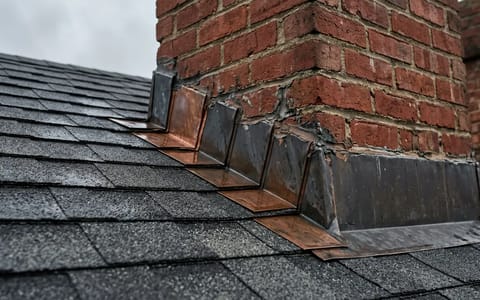
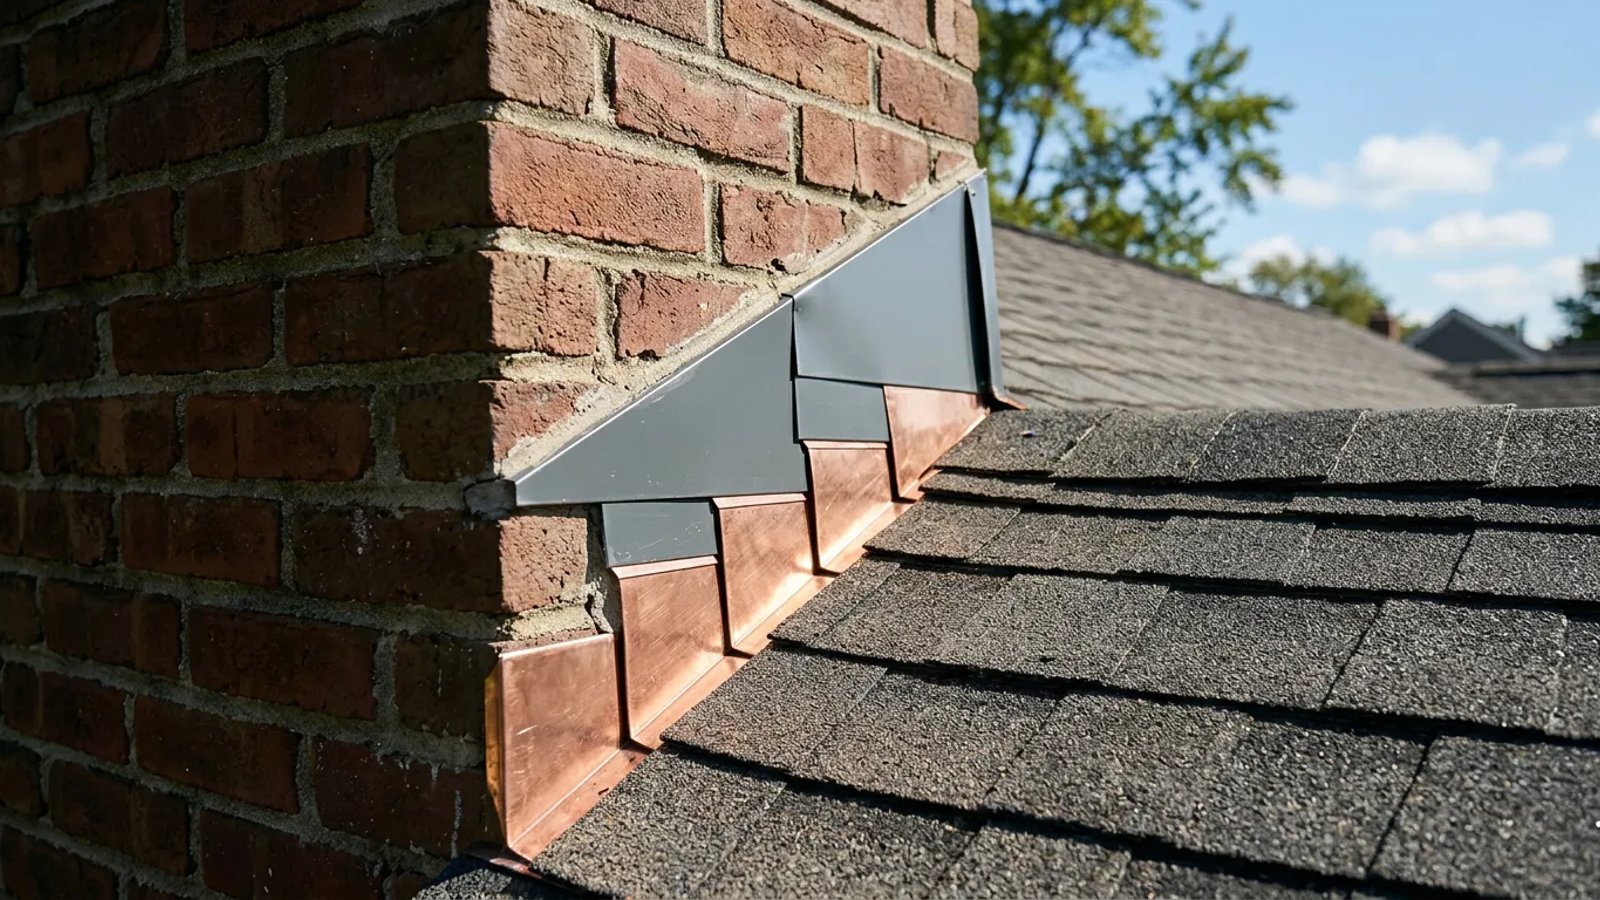
The first part is the step flashing. These are individual L-shaped pieces of metal—usually aluminum, galvanized steel, or copper. As the roofer installs shingles up the side of the chimney, they weave one piece of step flashing over each shingle, sliding the vertical part of the "L" against the brick. This protects the roof deck, but the top edge of that metal is still exposed to water running down the face of the brick.
This is where the second part, the counter-flashing, comes in. Counter-flashing is a continuous strip of metal that covers the exposed top edge of the step flashing. But it is not just glued to the brick. A professional mason or roofer uses an angle grinder to cut a groove about 1 inch deep directly into the mortar joints between the bricks. The top edge of the counter-flashing is bent, pushed deep into that mortar joint, and secured. Water running down the chimney hits the counter-flashing, drops onto the step flashing, flows onto the shingles, and runs down to the gutters.
Tar doesn't fix a flashing leak; it just hides the problem while the wood underneath rots.
According to the International Residential Code (IRC), proper flashing must be installed at all wall and roof intersections. Relying on surface sealants does not meet building codes because it is a guaranteed failure point.
How to Clean Up a Previous Owner's Tar Mess
If you recently bought an older home, or if you previously tried the tar method yourself, you cannot install proper flashing or masonry sealants until the old mess is gone. Removing decades-old roofing mastic is a tedious job, but it is entirely necessary. New sealants will not stick to old, oily tar.
- Soften the old mastic. Use a heat gun on a low setting to gently warm the old tar. Keep the heat moving constantly so you do not scorch the shingles or the brick.
- Scrape the bulk material. Use a stiff, narrow metal putty knife to scrape away the heavy chunks of softened tar. Keep a trash bag hooked to your ladder to drop the sticky chunks into immediately.
- Clean the metal and brick. Once the heavy chunks are gone, apply mineral spirits to a heavy-duty rag. Rub the remaining residue off the metal flashing and the face of the brick. You may need a wire brush for stubborn spots on the masonry.
- Inspect the underlying metal. With the tar gone, look closely at the step and counter-flashing. If the metal is rusted through, heavily bent, or missing entirely, it must be replaced.
Working on a roof requires extreme caution. Wear shoes with soft, high-traction rubber soles, and never work on a steep pitch without a proper safety harness anchored to the roof framing.
When Can You Actually Use Sealant?
While slathering tar over a joint is a mistake, there is a specific time and place for high-quality sealants in chimney maintenance. If your mechanical flashing is in good shape, but the mortar joint where the counter-flashing is embedded has developed a hairline crack or a small pinhole, you can patch it.
However, you must use the right product. Throw away the standard silicone caulk and avoid anything labeled "roofing mastic." You need a high-grade polyurethane masonry sealant, such as Sikaflex or Loctite PL. Polyurethane is incredibly elastic, meaning it can stretch and compress as the chimney moves without breaking its bond. It also holds up exceptionally well to UV radiation.
If the gap in the mortar is wider than 1/4 inch, sealant alone will not work. You will need to press a foam backer rod into the gap first to give the sealant something to rest against, or ideally, have the joint repointed with fresh mortar.
When to Call a Professional Roofer
Understanding how your chimney sheds water is empowering, but knowing your limits is what saves you money in the long run. Inspecting your chimney and replacing a small bead of polyurethane in a mortar joint is a great weekend task. Fabricating and installing custom sheet metal on a steep incline is not.
If you go into your attic during a heavy rainstorm and see water running down the outside of the brick chimney chase, do not wait. Every storm that passes is degrading the structural integrity of your roof deck. A professional can strip back the shingles around the chimney, replace any rotted plywood, install an ice and water shield underlayment, and weave in brand new step and counter-flashing.
A leaking chimney is stressful, but the fix is straightforward once you understand the mechanics. Put down the bucket of tar, respect the physics of water flow, and ensure your home relies on proper metal flashing to stay dry. Doing it right the first time will save your roof, your ceiling, and your weekends for years to come.
- Never use standard silicone caulk or roofing mastic as a permanent fix for chimney leaks.
- Mechanical flashing works like shingles, shedding water over the layer below it without relying on a chemical seal.
- Removing old tar requires a stiff putty knife, a heat gun on low, and mineral spirits to dissolve the residue.
- If your counter-flashing is pulled away from the brick, the mortar joint needs to be ground out and the metal reseated.